Exploring Advanced OOP Concepts: A Deep Dive into Coupling, Cohesion, Object Type Casting, Static and Instance Control Flow
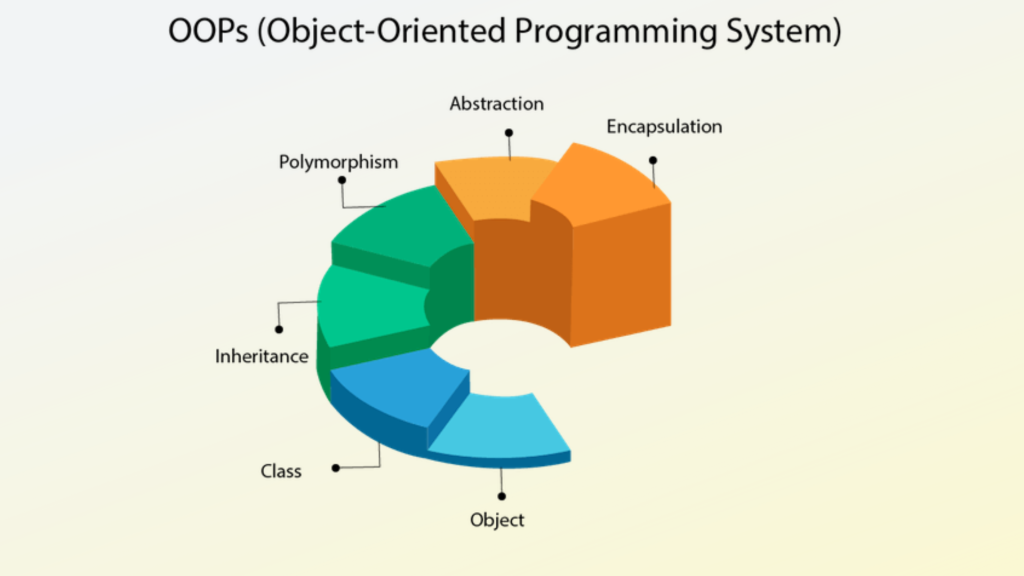
Object-Oriented Programming (OOP) is a powerful way of organizing and structuring code using objects. In advanced OOP, developers often focus on concepts like how closely or loosely objects are connected (coupling), how well elements within an object work together (cohesion), changing the type of an object (object type casting), and controlling the flow of code at both static and dynamic levels (static and instance control flow). Let’s take a closer look at each of these ideas.
Coupling in Advanced OOP
Coupling indicates how tightly two or more components are connected. Tight coupling occurs when components are highly interdependent, meaning changes in one component can significantly impact other components. This tight coupling can lead to several challenges, including:
- Reduced maintainability: Changes in one component may require corresponding changes in other dependent components, making it difficult to modify the code without causing unintended consequences.
- Limited reusability: Tightly coupled components are often specific to a particular context and may not be easily reused in other applications.
On the other hand, loose coupling promotes code reusability and maintainability. Loosely coupled components are less interdependent, allowing them to be modified or replaced without affecting other components. This decoupling can be achieved through techniques such as:
- Abstraction: Using interfaces and abstract classes to define common behaviors and decouple specific implementations.
- Dependency injection: Injecting dependencies into classes instead of creating them directly, promoting loose coupling and easier testing.
Tight Coupling : The Pitfalls
Tightly coupling occurs when one component relies heavily on another, creating a strong dependency. While this may seem convenient initially, it leads to difficulties in enhancing or modifying code. For instance, consider a scenario where a database connection is hardcoded into multiple classes. If the database schema changes, every class using the database must be modified, making maintenance a nightmare. Let’s explore one more a real-life java example:
// Tightly Coupled Classes
class Order {
    private Payment payment;

    public Order() {
        this.payment = new Payment();
    }

    public void processOrder() {
        // Processing order logic
        payment.chargePayment();
    }
}

class Payment {
    public void chargePayment() {
        // Payment logic
    }
}
In this example, the Order class is tightly coupled to the Payment class. The Order class directly creates an instance of Payment, making it hard to change or extend the payment process without modifying the Order class.
Loose Coupling : The Path to Reusability
Loosely coupling, on the other hand, signifies a lower level of dependency between components. A loosely coupled system is designed to minimize the impact of changes in one module on other modules. This promotes a more modular and flexible codebase, enhancing maintainability and reusability. Loosely coupled systems are considered good programming practice, as they facilitate the creation of robust and adaptable software. An example is a plug-in architecture, where components interact through well-defined interfaces. If a module needs to be replaced or upgraded, it can be done without affecting the entire system.
Consider a web application where payment processing is handled by an external service. If the payment module is loosely coupled, switching to a different payment gateway is seamless and requires minimal code changes.
Let’s modify the previous example to achieve loose coupling:
// Loosely Coupled Classes
class Order {
    private Payment payment;

    public Order(Payment payment) {
        this.payment = payment;
    }

    public void processOrder() {
        // Processing order logic
        payment.chargePayment();
    }
}

class Payment {
    public void chargePayment() {
        // Payment logic
    }
}
Now, the Order class accepts a Payment object through its constructor, making it more flexible. You can easily switch to a different payment method without modifying the Order class, promoting reusability and easier maintenance.
Cohesion
Cohesion measures the degree to which the methods and attributes within a class are related to each other. High cohesion implies that a class focuses on a well-defined responsibility, making it easier to understand and maintain. Conversely, low cohesion indicates that a class contains unrelated methods or attributes, making it difficult to grasp its purpose and potentially introducing bugs.
High cohesion can be achieved by following these principles:
- Single responsibility principle (SRP): Each class should have a single responsibility, focusing on a specific task or functionality.
- Meaningful methods and attributes: All methods and attributes within a class should be relevant to the class’s primary purpose.
Low cohesion can manifest in various ways, such as:
- God classes: Classes that contain a vast amount of unrelated functionality, making them difficult to maintain and understand.
- Data dumping: Classes that simply store data without any associated processing or behavior.
High Cohesion: The Hallmark of Good Design
High cohesion is achieved when a class or module has well-defined and separate responsibilities. Each class focuses on a specific aspect of functionality, making the codebase more modular and easier to understand. For instance, in a banking application, having separate classes for account management, transaction processing, and reporting demonstrates high cohesion.
Let’s consider a simple example with high cohesion:
// High Cohesion Class
class Calculator {
    public int add(int a, int b) {
        return a + b;
    }

    public int subtract(int a, int b) {
        return a - b;
    }
}
In this example, the Calculator class has high cohesion as it focuses on a clear responsibility—performing arithmetic operations. Each method has a specific and well-defined purpose, enhancing readability and maintainability.
Low Cohesion: A Recipe for Complexity
Conversely, low cohesion occurs when a module houses unrelated or loosely related functionalities. In a low cohesion system, a single class or module may have a mix of responsibilities that are not clearly aligned. This makes the code harder to comprehend and maintain. Low cohesion is generally discouraged in good programming practices as it undermines the principles of modularity and can lead to increased complexity and difficulty in debugging. If a single class handles user authentication, file I/O, and data validation, it exhibits low cohesion.
Low cohesion occurs when a class handles multiple, unrelated responsibilities. Let’s illustrate this with an example:
// Low Cohesion Class
class Employee {
    private String name;
    private double salary;
    private Date hireDate;

    // Methods handling unrelated responsibilities
    public void calculateSalary() {
        // Salary calculation logic
    }

    public void trackEmployeeAttendance() {
        // Attendance tracking logic
    }
}
In this example, the Employee class has low cohesion as it combines salary calculation and attendance tracking, which are unrelated responsibilities. This can lead to code that is harder to understand and maintain.
Object Type Casting
Object type casting, also known as type conversion, is the process of converting an object of one data type to another. This can be done explicitly or implicitly.
Explicit type casting is done by using a cast operator, such as (String). Implicit type casting is done by the compiler, and it happens automatically when the compiler can determine that an object can be converted to another type.
Understanding Object Type Casting
Object type casting involves converting an object of one data type into another. In OOP, this typically occurs when dealing with inheritance and polymorphism. Object type casting can be broadly classified into two categories: upcasting and downcasting.
Upcasting, also known as widening, refers to casting an object to its superclass or interface. This is a safe operation, as it involves converting an object to a more generic type.
Downcasting, on the other hand, also known as narrowing, involves casting an object to its subclass. This operation is riskier, as it involves converting an object to a more specific type. If the object is not actually an instance of the subclass, a ClassCastException will be thrown.
Object Type Casting Syntax
The syntax for object type casting in Java is as follows:
A b = (C) d;Here, A is the name of the class or interface, b is the name of the reference variable, C is the class or interface, and d is the reference variable.
It’s important to note that C and d must have some form of inheritance or interface implementation relationship. If not, a compile-time error will occur, indicating “inconvertible types.”
Let’s dive into a practical example to understand this better:
Object o = new String("Amol");

// Attempting to cast Object to StringBuffer
StringBuffer sb = (StringBuffer) o; // Compile Error: inconvertible types
In this example, we create an Object reference (o) and initialize it with a String object. Then, we try to cast it to a StringBuffer. Since String and StringBuffer do not share an inheritance relationship, a compile-time error occurs.
Dealing with ClassCastExceptions
It’s crucial to ensure that the underlying types of the reference variable (d) and the class or interface (C) are compatible; otherwise, a ClassCastException will be thrown at runtime.
Object o = new String("Amol");

// Attempting to cast Object to String
String str = (String) o; // No issues, as the underlying type is String
In this case, the cast is successful because the underlying type of o is indeed String. If you attempt to cast to a type that is not compatible, a ClassCastException will be thrown.
Working Code Example
Here’s a complete working example to illustrate object type casting:
public class ObjectTypeCastingExample {
    public static void main(String[] args) {
        // Creating an Object reference and initializing it with a String object
        Object o = new String("Amol");

        // Casting Object to String
        Object o1 = (String) o;

        // No issues, as the underlying type is String
        System.out.println("Casting successful: " + o1);
    }
}
In this example, an Object reference o is created and assigned a String object. Subsequently, o is cast to a String, and the result is stored in another Object reference o1. The program then confirms the success of the casting operation through a print statement.
Reference Transitions
In object type casting, the essence lies in providing a new reference type for an existing object rather than creating a new object. This process allows for a more flexible handling of objects within a Java program. Let’s delve into a specific example to unravel the intricacies of this concept.
Integer I = new Integer(10);  // line 1
Number n = (Number) I;       // line 2
Object o = (Object) n;       // line 3
In the above code snippet, we start by creating an Integer object I and initializing it with the value 10 (line 1). Following this, we cast I to a Number type, resulting in the line Number n = (Number) I (line 2). Finally, we cast n to an Object, yielding the line Object o = (Object) n (line 3).
When we combine line 1 and line 2, we essentially have:
Number n = new Integer(10);This is a valid operation in Java since Integer is a subclass of Number. Similarly, if we combine all three lines, we get:
Object o = new Integer(10);Now, let’s explore the comparisons between these objects:
System.out.println(I == n);  // true
System.out.println(n == o);  // true
Surprisingly, both comparisons yield true. This might seem counterintuitive, but it can be explained by the concept of autoboxing and reference types.
Autoboxing and Reference Types
n Java, autoboxing allows primitive data types to be automatically converted into their corresponding wrapper classes when needed. In the given example, the Integer object I is automatically unboxed to an int when compared with n. Therefore, I == n evaluates to true because both represent the same numerical value.
The comparison n == o also yields true. This is due to the fact that all objects in Java ultimately inherit from the Object class. Hence, regardless of the specific type of the object, if no specific behavior is overridden, the default Object methods will be invoked, leading to a successful comparison.
Type Casting in Multilevel Inheritance
Multilevel inheritance is the process of inheriting from a class that has already inherited from another class.
Suppose we have a multilevel inheritance hierarchy where class C extends class B, and class B extends class A.
class A {
    // Some code for class A
}

class B extends A {
    // Some code for class B
}

class C extends B {
    // Some code for class C
}
Now, let’s look at type casting:
Casting from C to B
C c = new C();   // Creating an object of class C
B b = (B) c;      // Casting C to B, creating a reference of type B pointing to the same C object
Here, b is now a reference of type B pointing to the object of class C. This is valid because class C extends class B.
Casting from C to A through B
C c = new C();   // Creating an object of class C
A a = (A) ((B) c); // Casting C to B, then casting the result to A, creating a reference of type A
This line first casts C to B, creating a reference of type B. Then, it casts that reference to A, creating a reference of type A pointing to the same object of class C. This is possible due to the multilevel inheritance hierarchy (C extends B, and B extends A).
In a multilevel inheritance scenario, you can perform type casting up and down the hierarchy as long as the relationships between the classes allow it. The key is that the classes involved have an “is-a” relationship, which is a fundamental requirement for successful type casting in Java.
Type Casting With Respect To Method Overriding
Type casting and overriding are not directly related concepts. Type casting is used to change the perceived type of an object, while overriding is used to modify the behavior of a method inherited from a parent class. However, they can interact indirectly in certain situations.
Suppose we have a class hierarchy where class P has a method m1(), and class C extends P and has its own method m2().
class P {
    void m1() {
        // Implementation of m1() in class P
    }
}

class C extends P {
    void m2() {
        // Implementation of m2() in class C
    }
}
Now, let’s look at some scenarios involving type casting:
Using Child Reference
C c = new C();
c.m1(); // Can call m1() using a child reference
c.m2(); // Can call m2() using a child reference
This is straightforward. When you have an object of class C, you can directly call both m1() and m2() using the child reference c.
Type Casting for m1():
((P) c).m1(); // Using type casting to call m1() using a parent reference
Here, we are casting the C object to type P and then calling m1(). This works because C is a subtype of P, and using a parent reference, we can call the overridden method m1() in the child class.
Type Casting for m2():
((P) c).m2(); // Using type casting to call m2() using a parent referenceThis line would result in a compilation error. Even though C is a subtype of P, the reference type determines which methods can be called. Since the reference is of type P, the compiler only allows calling methods that are defined in class P. Since m2() is specific to class C and not present in class P, a compilation error occurs.
Type casting in Java respects the reference type, and it affects which methods can be invoked. While you can cast an object to a parent type and call overridden methods, you cannot call methods that are specific to the child class unless the reference type supports them.
Type Casting and Static Method
In Java, method resolution is based on the dynamic type of the object, which is the class of the object at runtime. This is called dynamic dispatch. However, for static methods, method resolution is based on the compile-time type of the reference, which is the class that declared the method. This is called static dispatch.
Instance Method Invocation
C c = new C();
c.m1();  // Output: C   //but if m1() is static --> C
In this case, you are creating an instance of class C and invoking the method m1() on it. Since C has a non-static method m1(), it will execute the method from class C.
If m1() were static, it would still execute the method from class C because static methods are not overridden in the same way as instance methods.
Static Method Invocation with Child Reference
((B)c).m1(); // Output: C // but if m1() is static --> B
Here, you are casting an instance of class C to type B and then calling the method m1(). Again, it will execute the non-static method from class C.
If m1() were static, the output would be from class B. This is because static methods are resolved at compile-time based on the reference type, not the runtime object type.
Static Method Invocation with Nested Type Casting
((A)(B(C))).m1(); --> C // but if m1() is static --> BIn this scenario, you are casting an instance of class C to type B and then casting it to type A before calling the method m1(). The result is still the non-static method from class C.
If m1() were static, it would output the result based on the reference type B, as static method resolution is based on the reference type at compile-time.
Variable resolution and Type Casting
Variable resolution in Java is based on the reference type of the variable, not the runtime type of the object. This means that when you access a variable through a parent class reference, you will always get the value of the variable from the parent class, even if the object being referenced is an instance of a subclass.
Instance Variable Access
C c = new C();
c.x; // Accesses the x variable from class A, so the value is 777
In this case, you are creating an instance of class C and accessing the variable x. The result is 777, which is the value of x in class A, as the reference type is C, and the variable resolution is based on the reference type at compile-time.
Instance Method Invocation with Type Casting
((B) c).m1(); // Calls m1() from class B, so the output is 888
Here, you are casting an instance of class C to type B and then calling the method m1(). The result is 888, which is the value of x in class B. This is because variable resolution for instance variables is based on the reference type at compile-time.
Instance Method Invocation with Nested Type Casting
((A) ((B) c)).m1(); // Calls m1() from class C, so the output is 999
In this scenario, you are casting an instance of class C to type B and then casting it to type A before calling the method m1(). The result is 999, which is the value of x in class C. This is because variable resolution, similar to method resolution, is based on the reference type at compile-time.
The variable resolution is based on the reference type of the variable, and it is determined at compile-time, not at runtime. Each cast influences the resolution based on the reference type specified in the cast.
Static and Instance Control Flow
In OOP, control flow refers to the order in which statements and instructions are executed. There are two types of control flow: static and instance.
- Static Control Flow: This refers to the flow of control that is determined at compile-time. Static control flow is associated with static methods and variables, and their behavior is fixed before the program runs.
- Instance Control Flow: This refers to the flow of control that is determined at runtime. Instance control flow is associated with instance methods and variables, and their behavior can vary depending on the specific instance of the class.
Let’s explore each of them in much detail:
Static Control Flow
Static control flow in Java refers to the order in which static members (variables, blocks, and methods) are initialized and executed when a Java class is loaded. The static control flow process consists of three main steps:
1. Identification of static members from top to bottom
The Java compiler identifies all static members of a class as it parses the class declaration. This involves determining the name, data type, and default value of each static variable, as well as the content of each static block and the signature and body of each static method.
In Java, static members include static variables and static blocks. They are identified from top to bottom in the order they appear in the code. Here’s an example:
class StaticExample {
    static int staticVariable1 = 10; // Static variable declaration (Step 1)

    static {
        System.out.println("Static block 1"); // Static block (Step 2)
    }

    static int staticVariable2 = 20; // Static variable declaration (Step 3)

    static {
        System.out.println("Static block 2"); // Static block (Step 4)
    }

    public static void main(String[] args) {
        System.out.println("Main method"); // Main method (Step 5)
    }
}
2. Execution of static variable assignments and static blocks from top to bottom:
Once all static members have been identified, the compiler executes the assignments to static variables and the code within static blocks. Static variable assignments simply assign the default value to the variable, while static blocks contain statements that are executed in the order they appear in the code. Static blocks are executed at the time of class loading, before any instance of the class is created.
The static variable assignments and static blocks are executed in the order they appear from top to bottom. So, in the example above:
- Step 1:
staticVariable1is assigned the value 10. - Step 2: Static block 1 is executed.
- Step 3:
staticVariable2is assigned the value 20. - Step 4: Static block 2 is executed.
3. Execution of the main method
If the class contains a main method, it is executed after all static members have been initialized and executed. The main method is the entry point for a Java application, and it typically contains the code that defines the application’s behavior.
The main method is the entry point of a Java program. It is executed after all static variable assignments and static blocks have been executed. So, in the example above, after Step 4, the main method will be executed.
Assuming you run this class as a Java program, the output will be:
Static block 1
Static block 2
Main method
The static control flow process ensures that static members are initialized and executed in a predictable order, regardless of how or when an instance of the class is created. This is important for maintaining the consistency and integrity of the class’s state.
Static Block Execution
Static blocks in Java are executed at the time of class loading. This means that the statements within a static block are executed before any instance of the class is created or the main method is called. Static blocks are typically used to perform initialization tasks that are common to all objects of the class.
The execution of static blocks follows a top-down order within a class. This means that the statements in the first static block are executed first, followed by the statements in the second static block, and so on.
class Test {
    static {
        System.out.println("Hello, I can Print");
        System.exit(0);
    }
}
In this code snippet, there is only one static block. When the Test class is loaded, the statements within this static block will be executed first. The output of this code snippet will be:
o/p – Hello I can Print
The System.exit(0) statement causes the program to terminate immediately after printing the output. Without this statement, the main method would not be found, resulting in a NoSuchMethodFoundException.
Now, let’s see the slightly modified code:
class Test {
    static int x = m1();

    public static int m1() {
        System.out.println("Hello, I can Print");
        System.exit(0);
        return 10;
    }
}
In this code snippet, there is no static block, but there is a static variable x that is initialized using the value returned by the m1() method. The m1() method is also a static method.
When the Test class is loaded, the static variable x will be initialized first. This will cause the m1() method to be executed, which will print the following output:
o/p – Hello I can Print
The System.exit(0) statement in the m1() method causes the program to terminate immediately after printing the output.
Static Block Inheritance
Static block execution follows a parent-to-child order in inheritance. This means that the static blocks of a parent class are executed first, followed by the static blocks of its child class.
Let’s consider a scenario where you have a parent class and a child class. I’ll provide examples and explain the identification and execution steps:
Identification of static members from parent to child
When a child class inherits from a parent class, it inherits both instance and static members. However, it’s important to note that static members belong to the class itself, not to instances of the class. Therefore, when accessing static members in a child class, they are identified by the class name, not by creating an instance of the parent class.
class Parent {
    static int staticVar = 10;

    static void staticMethod() {
        System.out.println("Static method in Parent class");
    }
}

class Child extends Parent {
    public static void main(String[] args) {
        // Accessing static variable from the parent class
        System.out.println("Static variable from Parent: " + Parent.staticVar);

        // Accessing static method from the parent class
        Parent.staticMethod();
    }
}
In the example above, the child class Child accesses the static variable and static method of the parent class Parent directly using the class name Parent.
Execution of static variable assignments and static blocks from parent to child
Inheritance also influences the execution of static members, including variable assignments and static blocks, from the parent to the child class. Static variable assignments and static blocks in the parent class are executed before those in the child class.
class Parent {
    static int staticVar = initializeStaticVar();

    static {
        System.out.println("Static block in Parent");
    }

    static int initializeStaticVar() {
        System.out.println("Initializing staticVar in Parent");
        return 20;
    }
}

class Child extends Parent {
    static {
        System.out.println("Static block in Child");
    }

    public static void main(String[] args) {
        // Accessing static variable from the parent class
        System.out.println("Static variable from Parent: " + Parent.staticVar);
    }
}
In this example, the output will be:
Initializing staticVar in Parent
Static block in Parent
Static variable from Parent: 20
Static block in Child
The static variable initialization and static block in the parent class are executed before the corresponding ones in the child class.
Execution of main method of only child class
When executing a Java program, the main method serves as the entry point. If a child class has its own main method, it will be executed when running the program. However, the main method in the parent class won’t be invoked unless explicitly called from the child’s main method.
class Parent {
    public static void main(String[] args) {
        System.out.println("Main method in Parent");
    }
}

class Child extends Parent {
    public static void main(String[] args) {
        System.out.println("Main method in Child");

        // Calling the parent's main method explicitly
        Parent.main(args);
    }
}
In this example, if you run the Child class, the output will be:
Main method in Child
Main method in Parent
The child class’s main method is executed, and it explicitly calls the parent class’s main method.
Instance Control Flow
Instance control flow in Java refers to the sequence of steps that are executed when an object of a class is created. It involves initializing instance variables, executing instance blocks, and calling the constructor. Instance control flow is different from static control flow, which is executed only once when the class is loaded into memory.
Let’s delve into the detailed steps of the instance control flow:
Identification of instance members from top to bottom
The first step in the instance control flow is the identification of instance members. These include instance variables and instance blocks, which are components of a class that belong to individual objects rather than the class itself. The order of identification is from top to bottom in the class definition.
public class InstanceControlFlowExample {
    // Instance variable
    int instanceVar1 = 5;

    // Instance block
    {
        System.out.println("Instance block 1, instanceVar1: " + instanceVar1);
    }

    // Another instance variable
    String instanceVar2 = "Hello";

    // Another instance block
    {
        System.out.println("Instance block 2, instanceVar2: " + instanceVar2);
    }

    // Constructor
    public InstanceControlFlowExample() {
        System.out.println("Constructor");
    }

    public static void main(String[] args) {
        // Creating an object triggers instance control flow
        new InstanceControlFlowExample();
    }
}
In this example, instanceVar1 is identified first, followed by the first instance block, then instanceVar2 and the second instance block.
Execution of instance variable assignments and instance blocks from top to bottom
Once the instance members are identified, the next step is the execution of instance variable assignments and instance blocks in the order they were identified.
// ... (previous code)

public class InstanceControlFlowExample {
    // ... (previous code)

    // Another instance variable
    String instanceVar3;

    // Another instance block
    {
        instanceVar3 = "World";
        System.out.println("Instance block 3, instanceVar3: " + instanceVar3);
    }

    // ... (previous code)

    public static void main(String[] args) {
        // Creating an object triggers instance control flow
        new InstanceControlFlowExample();
    }
}
In this modification, a new instance variable instanceVar3 is introduced along with a corresponding instance block that assigns a value to it.
Execution of the constructor
The final step in the instance control flow is the execution of the constructor. The constructor is a special method that is called when an object is created. It is responsible for initializing the object and performing any additional setup.
// ... (previous code)

public class InstanceControlFlowExample {
    // ... (previous code)

    // Another instance variable
    String instanceVar4;

    // Another instance block
    {
        instanceVar4 = "!";
        System.out.println("Instance block 4, instanceVar4: " + instanceVar4);
    }

    // Constructor
    public InstanceControlFlowExample() {
        System.out.println("Constructor executed at 10:00");
    }

    public static void main(String[] args) {
        // Creating an object triggers instance control flow
        new InstanceControlFlowExample();
    }
}
In this final modification, a new instance variable instanceVar4 is introduced along with a corresponding instance block. The constructor now includes a timestamp indicating that it is executed at 10:00.
Avoiding unnecessary object creation
Object creation is a relatively expensive operation in Java. This is because the JVM needs to allocate memory for the object, initialize its instance variables, and set up its internal data structures. Therefore, it is important to avoid unnecessary object creation. One way to do this is to reuse objects whenever possible. For example, you can use a cache to store frequently used objects.
Static control flow Vs. Instance control flow
| Feature | Static control flow | Instance control flow |
|---|---|---|
| Execution | Executed once when the class is loaded | Executed for every object of the class that is created |
| Purpose | Initialize static members | Initialize instance members |
| Scope | Class-level | Object-level |
Instance Control Flow in Parent and Child Classes
In Java, instance control flow plays a crucial role in determining the initialization sequence when an object of a subclass is created. It involves identifying and executing instance members from both the parent and subclass.
Let’s break down the steps involved in the instance control flow in this context:
Identification of Instance Members from Parent to Child
The instance control flow begins with the identification of instance members in both the parent and child classes. The order of identification is from the parent class to the child class.
public class ParentClass {
    // Parent instance variable
    int parentInstanceVar = 10;

    // Parent instance block
    {
        System.out.println("Parent Instance block, parentInstanceVar: " + parentInstanceVar);
    }

    // Parent constructor
    public ParentClass() {
        System.out.println("Parent Constructor");
    }
}

public class ChildClass extends ParentClass {
    // Child instance variable
    String childInstanceVar = "Child";

    // Child instance block
    {
        System.out.println("Child Instance block, childInstanceVar: " + childInstanceVar);
    }

    // Child constructor
    public ChildClass() {
        System.out.println("Child Constructor executed at 43:20");
    }
}
In this example, the parent class ParentClass has an instance variable, instance block, and a constructor. The child class ChildClass extends the parent class and introduces its own instance variable, instance block, and constructor.
Execution of Instance Variable Assignments and Instance Blocks in Parent Class
Once the instance members are identified, the next step is the execution of instance variable assignments and instance blocks in the parent class, in the order they were identified.
// ... (previous code)

public class ParentClass {
    // ... (previous code)

    // Parent instance variable
    int parentInstanceVar2;

    // Parent instance block
    {
        parentInstanceVar2 = 20;
        System.out.println("Parent Instance block 2, parentInstanceVar2: " + parentInstanceVar2);
    }

    // ... (previous code)
}

// ... (previous code)
In this modification, a new instance variable parentInstanceVar2 is introduced along with a corresponding instance block in the parent class.
Execution of Parent Constructor
Following the execution of instance variable assignments and instance blocks in the parent class, the parent constructor is executed.
// ... (previous code)

public class ParentClass {
    // ... (previous code)

    // Parent instance variable
    int parentInstanceVar3;

    // Parent instance block
    {
        parentInstanceVar3 = 30;
        System.out.println("Parent Instance block 3, parentInstanceVar3: " + parentInstanceVar3);
    }

    // Parent constructor
    public ParentClass() {
        System.out.println("Parent Constructor executed");
    }

    // ... (previous code)
}

// ... (previous code)
In this modification, a new instance variable parentInstanceVar3 is introduced along with a corresponding instance block in the parent class. The parent constructor now includes a print statement indicating its execution.
Execution of Instance Variable Assignments and Instance Blocks in Child Class
After the parent class’s instance control flow is completed, the control flow moves to the child class, where instance variable assignments and instance blocks are executed.
// ... (previous code)

public class ChildClass extends ParentClass {
    // ... (previous code)

    // Child instance variable
    String childInstanceVar2;

    // Child instance block
    {
        childInstanceVar2 = "Java";
        System.out.println("Child Instance block 2, childInstanceVar2: " + childInstanceVar2);
    }

    // ... (previous code)
}

// ... (previous code)
In this modification, a new instance variable childInstanceVar2 is introduced along with a corresponding instance block in the child class.
Execution of Child Constructor
The final step in the instance control flow is the execution of the child constructor.
// ... (previous code)

public class ChildClass extends ParentClass {
    // ... (previous code)

    // Child instance variable
    String childInstanceVar3;

    // Child instance block
    {
        childInstanceVar3 = "Programming";
        System.out.println("Child Instance block 3, childInstanceVar3: " + childInstanceVar3);
    }

    // Child constructor
    public ChildClass() {
        System.out.println("Child Constructor executed at 43:20");
    }
}
In this modification, a new instance variable childInstanceVar3 is introduced along with a corresponding instance block in the child class. The child constructor now includes a print statement indicating its execution at 43:20.
The sequence of execution follows the inheritance hierarchy, starting from the parent class and moving down to the child class. The instance control flow ensures that instance members are initialized and blocks are executed in the appropriate order during object creation.
One important point I want to highlight here is:
A non-static variable is inaccessible within a static block unless an object is instantiated. Access to the variable becomes possible only after creating an object. This occurs because, during the execution of static members, the JVM cannot recognize instance members without the creation of an object.
Conclusion
In conclusion, these advanced OOP features, including coupling, cohesion, object type casting, and control flow, play pivotal roles in shaping the structure, flexibility, and maintainability of object-oriented software. A thorough understanding of these concepts empowers developers to create robust and scalable applications.

