Artificial intelligence on mobile devices is no longer a futuristic concept — it’s part of our daily tech life. From facial recognition to voice assistants, AI is everywhere. For Android developers, the Neural Networks API (NNAPI) is the key to unlocking efficient on-device AI. In this guide, you’ll learn everything about NNAPI, why it matters, how it...
If you’ve ever worked with AI models, you know how exciting it is to see them in action. But here’s the catch — many models are slow to run, especially in production environments. That’s where ONNX Runtime comes in. It’s a game-changer for speeding up model inference without changing the model itself.
In this guide, you’ll learn exactly what ONNX Runtime is, why it’s useful, and how you can use it to run your AI models faster. Whether you’re a beginner in AI or an experienced developer looking for performance boosts, this post will break it down simply and clearly.
What Is ONNX Runtime (ORT)?
ONNX Runtime is an open-source, high-performance engine for running machine learning models. Developed by Microsoft, it supports models trained in popular frameworks like PyTorch, TensorFlow, and scikit-learn by converting them to the ONNX (Open Neural Network Exchange) format.
Think of ONNX Runtime as a universal language interpreter for AI models. You train your model in any framework, convert it to ONNX, and then ONNX Runtime takes care of running it efficiently across various hardware (CPU, GPU, even specialized accelerators).
Why Use ONNX Runtime?
Speed
ONNX Runtime is optimized for speed. It reduces inference time dramatically compared to native frameworks.
Cross-Platform
It runs on Windows, Linux, macOS, Android, and iOS. You can use it in cloud services, edge devices, or even mobile apps.
Flexibility
Supports models from PyTorch, TensorFlow, scikit-learn, XGBoost, and more — once converted to ONNX.
Cost-Efficient
Faster inference means fewer resources and lower cloud costs. Who doesn’t like saving money..?
How Does ONNX Runtime Work?
Here’s the simple flow:
Train your model using TensorFlow, PyTorch, or another framework.
Export the model to ONNX format.
Use ONNX Runtime to run inference — faster and more efficiently.
Running a Model with ONNX Runtime
Let’s see a basic Python example to understand how to use ONNX Runtime.
Install ONNX Runtime
Python
pip install onnxruntime
This command installs the CPU version. If you have a GPU, you can install the GPU version like this:
Python
pip install onnxruntime-gpu
Load an ONNX Model
Let’s say you have a model called model.onnx.
Python
import onnxruntime as ort# Create an inference sessionsession = ort.InferenceSession("model.onnx")
Prepare Input
You need to know the input names and shapes.
Python
import numpy as np# Get input nameinput_name = session.get_inputs()[0].name# Create dummy inputinput_data = np.random.randn(1, 3, 224, 224).astype(np.float32)
Run Inference
Python
# Run inferenceoutputs = session.run(None, {input_name: input_data})print("Model Output:", outputs[0])
That’s it! You just ran an AI model using ONNX Runtime in a few lines of code.
Leverage Execution Providers: Choose CUDAExecutionProvider for GPU, CPUExecutionProvider for CPU, or others like TensorRT.
Batch Inputs: Inference is faster with batched data.
Conclusion
ONNX Runtime is not just a tool — it’s a performance booster for AI inference. It simplifies deployment, cuts inference time, and makes your AI projects more scalable.
If you’ve been struggling with slow model inference or complicated deployments, ONNX Runtime is your friend. Install it, give it a try, and see the speed-up for yourself.
FAQs
Q: Is ONNX Runtime free? Yes, it’s completely open-source and free to use under the MIT license.
Q: Can I use ONNX Runtime with GPU? Absolutely. Just install onnxruntime-gpu and you’re good to go.
Q: Does ONNX Runtime support quantized models? Yes! It supports quantization for even faster and smaller models.
Artificial Intelligence (AI) seems like magic — type a prompt and it answers, upload a picture and it identifies objects, or speak to your phone and it replies smartly. But what happens behind the scenes when an AI makes these decisions? The answer lies in a crucial process calledmodel inference in AI.
In this guide, we’ll keep things simple and walk through a few easy coding examples. Whether you’re new to AI or just curious about how it works, you’ll come away with a clear understanding of how AI models make real-world predictions.
What is Model Inference in AI?
Think of AI as a student who spends months studying (training) and finally takes a test (inference). Model inference in AI refers to the phase where a trained model uses its knowledge to make predictions or decisions on new data it hasn’t seen before.
Training = Learning phase
Inference = Prediction phase (real-world usage)
When you ask a chatbot a question or upload an image to an app, the model is performing inference — it’s not learning at that moment but applying what it has already learned.
Real-Life Examples of Model Inference
Typing on your phone and seeing autocomplete suggestions? Model inference.
Netflix recommending a movie? Model inference.
AI detecting tumors in medical images? Model inference.
It’s the AI’s way of taking what it learned and helping you in the real world.
Why is Model Inference Important?
Without inference, AI would be useless after training. The whole point of AI is to make smart decisions quickly and reliably on new data.
Here’s why model inference in AI matters:
Speed: Fast inference means smooth user experiences (think instant translations or responses).
Efficiency: Good inference balances accuracy with hardware constraints (e.g., smartphones vs servers).
Real-World Application: From healthcare diagnoses to personalized recommendations, inference powers the AI tools we use daily.
Model Inference vs Model Training
How Model Inference in AI Works
Let’s walk through a typical inference workflow in simple terms.
1. Input Data
This is the real-world information the AI needs to process:
Text prompt (chatbots)
Image (object detection)
Voice (speech recognition)
2. Preprocessing
Before sending the input to the model, it’s cleaned and formatted:
Text is tokenized (split into words or subwords).
Images are resized or normalized.
Audio is converted into frequency data.
3. Model Prediction (Inference)
The preprocessed data enters the trained model:
The model applies mathematical operations (like matrix multiplications).
It calculates probabilities or outputs based on its training.
4. Postprocessing
The raw model output is converted into human-friendly results:
Probabilities are converted to labels (“cat” or “dog”).
Text tokens are transformed back into readable sentences.
5. Output
Finally, the AI gives you the result: a prediction, an answer, or an action.
Image Classification Inference
Let’s see a practical example using Python and a pretrained model from PyTorch.
Python
import torchfrom torchvision import models, transformsfrom PIL import Image# Load a pretrained model (ResNet18)model = models.resnet18(pretrained=True)model.eval() # Set model to inference mode# Preprocessing stepspreprocess = transforms.Compose([ transforms.Resize(256), transforms.CenterCrop(224), transforms.ToTensor(), transforms.Normalize(mean=[0.485, 0.456, 0.406],std=[0.229, 0.224, 0.225]),])# Load and preprocess the imageimage = Image.open("cat.jpg")input_tensor = preprocess(image)input_batch = input_tensor.unsqueeze(0) # Add batch dimension# Model Inferencewith torch.no_grad(): output = model(input_batch)# Get the predicted class_, predicted_class = torch.max(output, 1)print(f"Predicted class index: {predicted_class.item()}")
Here,
model.eval() puts the model in inference mode.
Preprocessing ensures the image matches the model’s expected input format.
The model predicts the class index of the image — this could be mapped to actual class names using imagenet_classes.
Let’s see one more working example using TensorFlow and a pre-trained model.
Python
import tensorflow as tfimport numpy as npfrom tensorflow.keras.applications import MobileNetV2from tensorflow.keras.applications.mobilenet_v2 import preprocess_input, decode_predictionsfrom tensorflow.keras.preprocessing import image# Load a pre-trained modelmodel = MobileNetV2(weights='imagenet')# Load and preprocess imageimg_path = 'dog.jpg'# path to your imageimg = image.load_img(img_path, target_size=(224, 224))img_array = image.img_to_array(img)img_array = np.expand_dims(img_array, axis=0)img_array = preprocess_input(img_array)# Perform inferencepredictions = model.predict(img_array)# Decode predictionsdecoded = decode_predictions(predictions, top=1)[0]print(f"Predicted: {decoded[0][1]} with confidence {decoded[0][2]:.2f}")
Here,
We load MobileNetV2, a pre-trained model.
We preprocess the image to fit model input size.
model.predict() runs model inference.
The result is a human-readable prediction.
So, basically,
ResNet-18 is for general-purpose use where computational resources are available — great for accuracy without worrying too much about speed.
MobileNetV2 is designed for efficiency, trading off a bit of accuracy for speed and low resource use, especially on mobile or embedded devices.
If you need speed and small model size, go for MobileNetV2. If you need accuracy and don’t care about size/speed, ResNet-18 is a solid choice.
Optimizing Model Inference in AI
In real-world applications, inference needs to be fast, efficient, and accurate. Here are some common optimization techniques:
Quantization: Reduce model size by using lower precision (e.g., float32 → int8).
Model Pruning: Remove unnecessary neurons or layers.
Hardware Acceleration: Use GPUs, TPUs, or specialized chips.
Batching: Process multiple inputs at once to maximize efficiency.
ONNX and TensorRT: Export models to efficient formats for deployment.
Edge AI: Run inference directly on mobile/IoT devices.
These techniques allow you to deploy AI on devices ranging from cloud servers to mobile phones.
Inference Deployment: How AI Models Go Live
There are three common ways to deploy model inference in AI:
Cloud Inference: AI models run on powerful servers (e.g., AWS, Azure).
Edge Inference: Models run on devices (phones, cameras).
Hybrid Inference: Combines both to balance speed and accuracy.
Example: Google Lens uses edge inference for instant results, but may use cloud inference for more complex tasks.
Real-Life Examples of Model Inference in AI
Every time you use AI, you’re actually seeing model inference in action..!
Best Practices for Responsible Model Inference
To ensure trustworthy AI, especially in sensitive applications, keep these tips in mind:
Monitor inference outputs for bias.
Ensure privacy during inference (especially for personal data).
Test models in diverse scenarios before deployment.
Optimize for both performance and fairness.
FAQs on Model Inference in AI
Is inference always faster than training?
Yes! Inference happens in real-time, while training can take days.
Can inference happen offline?
Yes. With edge inference, AI runs without internet access.
Do I need GPUs for inference?
Not always. Many models run fine on CPUs, especially after optimization.
Conclusion: Bringing AI to Life
Model inference in AI is where the magic happens — when AI takes all its training and applies it to make real-world decisions. Whether it’s recommending a Netflix show, identifying diseases, or powering chatbots, inference ensures that AI doesn’t just stay in labs but actively helps people.
Quick Recap,
Model inference = real-time predictions using trained AI models.
Involves preprocessing, prediction, and postprocessing.
Optimizations make inference faster and efficient.
Responsible inference means ethical, fair, and private AI.
By understanding inference, you gain a deeper appreciation of how AI works, and you’re better equipped to build or use AI responsibly.
Managing dependencies in Android development can feel like juggling flaming torches—one wrong move, and your build breaks. If you’re tired of mismatched library versions, build errors, and long Gradle files, Android BOM might be the solution you didn’t know you needed.
In this guide, we’ll break down what Android BOM is, why it matters in 2025, and how you can start using it to clean up your project and avoid versioning headaches.
What Is Android BOM?
BOM stands for Bill of Materials. It’s a feature in Gradle (and supported by Maven too) that lets you manage versions of multiple libraries from a single source.
In the Android world, an Android BOM is typically published by a library maintainer (like Google for Jetpack Compose or Firebase) and defines the versioning for all related artifacts under the hood.
Instead of specifying a version number for each dependency manually, you just import the BOM, and it ensures all components stay in sync.
Why Use Android BOM in 2025?
In 2025, modern Android apps rely on a stack of complex, interconnected libraries. Manually managing versions is error-prone and inefficient.
Here’s why Android BOM is a must-have:
Simplifies Dependency Management
No more version conflicts or mismatched components.
Reduces Boilerplate
You can skip version numbers for each Firebase or Jetpack Compose module.
Keeps Everything in Sync
The BOM ensures all included libraries are compatible with each other.
Easier Upgrades
Want to update Firebase? Just bump the BOM version.
How Does It Work?
Here’s what a typical implementation looks like in your build.gradle.kts or build.gradle file:
This keeps your dependency management even more organized.
Best Practices When Using Android BOM
Stick to one BOM per group — Don’t mix Firebase and Compose BOMs in a single platform declaration. You can have multiple BOMs, but declare them separately.
Keep BOM versions updated — Stay on top of version updates for stability and security.
Avoid adding versions to individual artifacts if the BOM already manages them.
What If a Library Doesn’t Support BOM?
Some third-party libraries might not publish a BOM. In that case, you’ll still have to manage versions manually. But you can combine both approaches — use BOM for libraries that support it and pin versions for others.
Overriding BOM Versions
Sometimes, you might need a specific library version that’s newer (or older) than what the BOM provides. You can override it by specifying the version directly:
No, but it’s highly recommended for easier and safer dependency management.
Does BOM increase build time?
Actually, the opposite. Because it simplifies dependency resolution, it can help Gradle builds run more efficiently.
Conclusion
If you’re building Android apps in 2025, using Android BOM isn’t just a nice-to-have — it’s essential. It streamlines dependency management, prevents version mismatches, and keeps your codebase cleaner and safer.
Whether you’re working on a small app or a complex multi-module project, adopting Android BOM early will save you time and frustration.
In modern Android and Kotlin Multiplatform development, managing dependencies across multiple modules can quickly become messy. Manually updating versions in each build.gradle.kts file is not only error-prone—it’s a headache when scaling projects.
That’s where libs.versions.toml steps in—the primary and recommended configuration file for Gradle Version Catalogs, a game-changing feature introduced in Gradle 7.0 and stabilized in 7.4.
In this in-depth guide, you’ll learn how to master libs.versions.toml—from setting it up, organizing your dependencies and plugins, to managing versions like a seasoned pro.
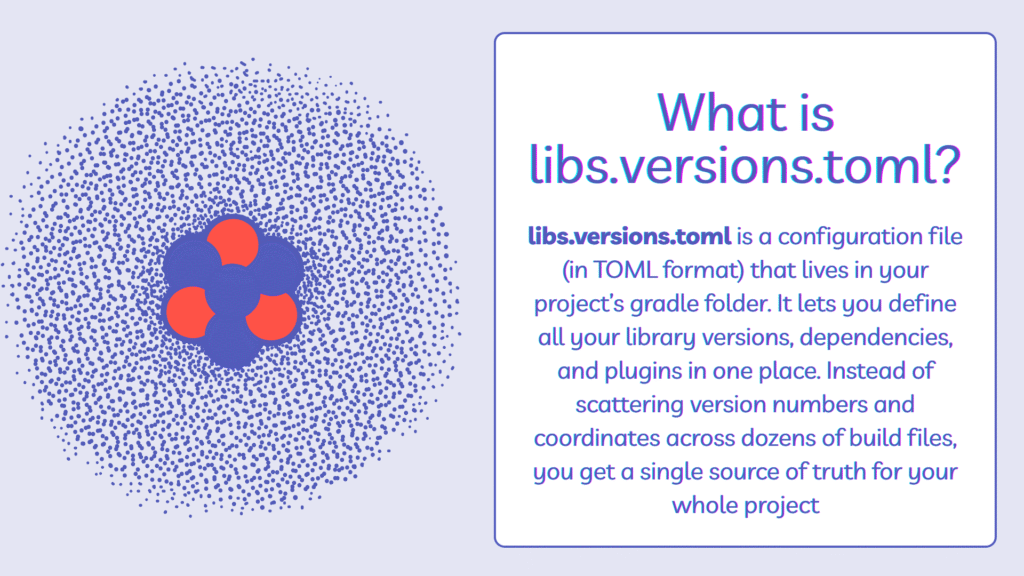
What is libs.versions.toml?
libs.versions.toml is a centralized configuration file introduced in Gradle 7+ that lets you declare and manage dependencies, plugin versions, and bundles in one place.
This improves:
Readability of dependency definitions
Consistency across modules
Maintainability by updating versions in a single file
Enabling Version Catalogs
Before you can use libs.versions.toml, make sure you’re on Gradle 7.0+ and Kotlin DSL (.kts).
In your project’s settings.gradle.kts, enable the version catalog:
As projects grow, consistency becomes critical. libs.versions.toml:
Reduces version mismatches
Makes updates seamless
Keeps modules DRY (Don’t Repeat Yourself)
Is IDE-friendly and fully supported by Android Studio
It’s the kind of practice that scales well in enterprise codebases and simplifies maintenance.
Conclusion
If you’re not using libs.versions.toml, now’s the time to start.
Whether you’re building a small Android app or managing dozens of modules across a large monorepo, version catalogs offer clarity, consistency, and control.
Keep your libs.versions.toml organized, document versions, and treat it like your project’s single source of truth.
If you’re still using SharedPreferences in your Android app, it’s time to level up. Google introduced Jetpack DataStore as the modern solution for storing key-value and typed objects in a more efficient, safe, and asynchronous way.
This function must be called from a coroutine or lifecycleScope.launch {}.
Step 5: Migrate Existing Data from SharedPreferences
Let’s say you have existing users and don’t want to lose their preferences.
Jetpack provides a migration tool built in:
Kotlin
val Context.dataStore: DataStore<Preferences> bypreferencesDataStore( name = "user_prefs", produceMigrations = { context ->listOf(SharedPreferencesMigration(context, "user_prefs")) })
This tells DataStore to automatically read and move values from SharedPreferences the first time it’s accessed.
Important:
The name in preferencesDataStore must match the SharedPreferences file name.
After migration, DataStore handles everything.
Step 6: Remove SharedPreferences Usage
Once you’re confident DataStore is working, clean up your codebase:
Delete old SharedPreferences references
Remove the old preference XML file if applicable
This makes your app lighter and future-proof.
Bonus: Best Practices for DataStore
Use a singleton or Context extension to access DataStore.
Keep key declarations in one place (object or constants file).
Prefer Flow + collect with lifecycle awareness to avoid leaks.
Validate and sanitize user input before writing to DataStore.
Conclusion
Migrating from SharedPreferences to Jetpack DataStore is a smart move. It modernizes your data layer, embraces async programming, and makes your app more robust.
With the step-by-step guide above, you should now feel confident making the switch. It’s not just about keeping up with Android trends — it’s about building better apps.
So go ahead, migrate from SharedPreferences to Jetpack DataStore, and give your app the stability and performance it deserv
If you’ve ever wondered why your Android phone suddenly becomes stingy with background tasks when left idle, the answer likely lies in Doze Mode. Introduced in Android 6.0 (Marshmallow), this feature promised to significantly improve battery life. But does it actually deliver?
Let’s break it down.
What Is Doze Mode?
Doze Mode is a battery-saving feature that kicks in when your device is idle for an extended period. Think of it as your phone going into “power nap” mode. During Doze, the system restricts background activities such as syncing, GPS, and network access to conserve energy.
Android doesn’t completely shut off these services but defers them to periodic maintenance windows. So your device can still check for important updates — just not every second.
When Does Doze Mode Activate?
Doze Mode isn’t triggered the moment you stop using your phone. Android checks several conditions:
The device is unplugged.
The screen is off.
The phone hasn’t moved for a while.
No active wake locks are held by apps.
Once all conditions are met, the phone enters Idle mode, and Doze begins throttling background processes.
Does Doze Mode Really Save Battery?
In one word: Yes — but with context.
Real-World Impact
If you’re someone who leaves their phone idle for long periods (e.g., overnight or during work hours), Doze Mode can significantly extend battery life. Users have reported up to 30% more standby time.
However, if your phone is constantly in use, or you’re moving around with it in your pocket, Doze may not activate often enough to make a noticeable difference.
How Developers Handle Doze Mode
If you’re a developer, ignoring Doze Mode can lead to broken background functionality. Here’s a simple example of how to test if your app works with Doze:
How to Check If Doze Mode Is Hurting App Performance
Some apps rely heavily on real-time background updates (think messaging or location tracking). If users report delays or missed notifications, Doze could be the culprit.
Quick Fix for Users
Go to Settings > Battery > Battery Optimization.
Select “All apps.”
Tap your app and choose “Don’t optimize.”
This removes Doze restrictions for that app, but use sparingly to avoid draining your battery.
How Android Developers Can Handle It
If you’re an app developer, you’ll want to make sure your app behaves properly while Doze Mode is active. Android offers special APIs so your alarms and background jobs don’t get lost in the shuffle.
Example: Scheduling Alarms in Doze Mode
By default, normal alarms are postponed. If your app needs to set a time-sensitive alarm (think: medication reminders or calendar events), you must use setAndAllowWhileIdle():
Java
AlarmManageralarmMgr = (AlarmManager) context.getSystemService(Context.ALARM_SERVICE);Intentintent = newIntent(context, AlarmReceiver.class);PendingIntentalarmIntent = PendingIntent.getBroadcast(context, 0, intent, 0);alarmMgr.setAndAllowWhileIdle(AlarmManager.RTC_WAKEUP, triggerAtMillis, // desired trigger time in milliseconds alarmIntent);
How This Works
setAndAllowWhileIdle() lets your alarm fire even if Doze Mode is triggered—but only for critical events.
Use this carefully, as Android limits how often you can schedule these alarms during Doze to prevent battery drain.
Best Practices for Developers
Use WorkManager: It’s built to handle Doze correctly.
Schedule jobs wisely: Use JobScheduler or AlarmManager with setAndAllowWhileIdle().
Test aggressively: Use adb shell dumpsys deviceidle to simulate Doze in development.
Final Verdict: Is Doze Mode Worth It?
Absolutely. For most users, Doze Mode runs silently in the background, extending battery life without sacrificing usability. It’s one of those features that just works — when you let it.
However, for power users and developers, understanding how Doze interacts with apps is essential. Used properly, Doze Mode strikes a smart balance between saving power and staying connected.
So yes, Doze Mode really does save battery. It’s not a gimmick — just smart engineering.
TL;DR (Too Long; Didn’t Read)
Doze Mode saves battery by pausing background tasks when your phone is idle.
It’s most effective when the device is stationary and unused.
Developers must adapt their apps to work within Doze constraints.
It works quietly, efficiently, and yes — it makes a real difference.
Frequently Asked Questions
Will I Miss Important Calls or Messages Because of Doze Mode?
No, Doze Mode is designed to allow high-priority push notifications and alarm clock events even while active, so you don’t miss critical alerts.
Can I Turn Off Doze Mode?
By default, Doze Mode is automatic and always-on from Android 6.0 onward. You can exclude specific apps via Android settings if you need certain apps to bypass it, but this can hurt your battery life.
Does Doze Mode Replace Battery Saver?
No, it’s a different feature. Battery Saver is a manual or automatic mode you can toggle, restricting performance and features for more aggressive savings. Doze Mode works behind the scenes automatically, focusing on background tasks while idle
When it comes to balancing app performance, user experience, and battery life, Android uses a sophisticated system of resource management that adapts dynamically based on the device’s current state. Understanding how these resource limits work is crucial for developers aiming to build efficient, battery-friendly, and responsive apps.
In this blog, we’ll dive deep into how Android enforces or exempts resource limits depending on whether the device is charging, the screen is on, or the device is in a low-power mode like Doze.
Why Device State Matters for Resource Limits
Modern smartphones juggle dozens of apps and background processes at once. Without some form of resource control, one rogue app could drain your battery, clog the network, or degrade user experience for everything else running on your phone. To combat this, Android classifies device state into several modes — charging, screen on,and screen off with Doze active — and applies or lifts resource limits accordingly.
Resource Controls by Device State: The Big Picture
Let’s break down how resource limits change based on the device state, focusing on four key areas every developer and advanced user should know: Jobs, Alarms, Network Access, and Firebase Cloud Messaging (FCM).
1. Device Charging
Charging is the most permissive state.
Jobs: When your device is plugged in, most job execution limits are lifted, with the exception of apps in the restricted standby bucket (these are apps the user or system has placed under heavy restriction for background activity).
Alarms: There are essentially no limits to alarm scheduling, unless you have manually restricted an app’s battery usage.
Network Access: Apps can access the network freely. No special throttling or restrictions are applied.
FCM: Firebase Cloud Messaging enjoys unrestricted delivery of both high and normal priority messages while charging.
If your app needs to perform heavy background work, leveraging the charging state is best practice for both user satisfaction and energy efficiency.
2. Screen On
Active usage, but with smart checks in place.
Jobs: Execution of background jobs is allowed, but still subject to limits based on the app’s standby bucket. Apps the system deems “frequent” get more leeway than those rarely used.
Alarms: Alarm limits are enforced based on both process (foreground or background) and standby bucket.
Network Access: Access to network resources is permitted, but could be throttled depending on standby bucket or app process state.
FCM: No restrictions. Both high and normal priority FCM messages are delivered without delay.
Even with the screen on, background execution is managed to prevent resource hogging but without compromising the user’s foreground tasks.
3. Screen Off & Doze Mode
Aggressive conservation to preserve battery.
Jobs: Execution is heavily restricted. Jobs are only permitted to run during periodic “maintenance windows” triggered by Doze. The standby bucket further dictates how much background work an app can do — a rarely used app may only get a 10-minute quota every 24 hours.
Alarms: Most alarms, especially regular alarms, are deferred until these maintenance windows. “While-idle” alarms are strictly limited (e.g., 7 per hour). This ensures that the device is not frequently awakened from deep sleep, maximizing battery savings.
Network Access: Network requests are typically deferred, especially for background apps. Only the most essential tasks will get through during Doze.
FCM: High priority messages are delivered immediately, bypassing Doze. Normal priority messages are deferred until the next maintenance window, so non-urgent notifications may experience some delay.
Doze mode is designed to maximize standby time without missing critical notifications or updates. Writing efficient background code means understanding and respecting these constraints.
Device State vs. Resource Limits
Device State
Jobs Execution
Alarms
Network Access
Firebase Cloud Messaging
Charging
No limits (except restricted standby bucket)
No execution limits (unless manually restricted)
No restrictions
No restrictions (both priorities)
Screen On
Based on standby bucket
Based on process & bucket
Based on process or bucket
No restrictions
Screen Off & Doze Active
Enforced by bucket; deferred to maintenance window
Deferred; while-idle alarms: 7/hr
Restricted; usually deferred
High priority: immediate, Normal: deferred
Developer Takeaways and Best Practices
Schedule background-intensive work during charging: Use job scheduling APIs to detect charging state and defer heavy tasks until then.
Respect Doze and App Standby Buckets: Design your background operations to be efficient and infrequent, using WorkManager or JobScheduler for compatibility.
Use High Priority FCM judiciously: Only essential and time-sensitive notifications should be sent with high priority to respect users’ battery life.
User control matters: Remember, users can manually restrict battery usage for specific apps, which overrides nearly all exemptions.
Conclusion
Android’s adaptive resource limits are a cornerstone of its battery and performance management strategy. By understanding how device state influences background jobs, alarms, network access, and cloud messaging, developers can craft apps that play nicely with the system, keeping users happy and devices running longer
Android power management has evolved significantly over the years. As developers, we need to design apps that are not only functional but also battery-friendly. Google introduced Doze Mode, App Standby, and various resource restrictions to extend battery life. While these features improve user experience, they can cause unexpected issues if apps aren’t built with resilience in mind.
In this guide, we’ll break down Android power management features, why they matter, and how you can build resilient Android apps that survive and thrive under these restrictions.
Why You Should Care About Android Power Management
Modern Android devices aggressively manage background processes to save battery. If your app misbehaves — draining battery or waking up the device too often — it can be throttled, delayed, or even killed. Worse case, when you might see user complaints about missed notifications or slow updates.
By understanding how Doze Mode, App Standby, and background restrictions work, you can ensure your app remains responsive while respecting battery life.
Doze Mode
Doze Mode activates when a device is idle for a while — screen off, unplugged, and stationary. Android periodically defers background CPU and network activity to preserve battery.
Key Points:
Your app’s background tasks get paused.
Network access is restricted.
Alarms (except AlarmManager.setExactAndAllowWhileIdle()) are deferred.
How to Handle Doze Mode Correctly:
Java
PowerManagerpm = (PowerManager) getSystemService(Context.POWER_SERVICE);if (pm.isIgnoringBatteryOptimizations(getPackageName())) {// Your app is exempted from Doze (rarely recommended)} else {// Use WorkManager or Firebase JobDispatcher for background tasks}
Instead of fighting Doze, work with it. Use WorkManager for deferrable background tasks. It automatically handles Doze and other restrictions.
App Standby: What Developers Must Know
App Standby identifies apps that aren’t used frequently and restricts their background activity.
Behavior:
Background network access is blocked.
Jobs and alarms are deferred.
High-priority notifications still work.
Detecting App Standby Bucket:
Java
UsageStatsManagerusageStatsManager = (UsageStatsManager) getSystemService(Context.USAGE_STATS_SERVICE);intappStandbyBucket = usageStatsManager.getAppStandbyBucket();switch (appStandbyBucket) {caseUsageStatsManager.STANDBY_BUCKET_ACTIVE:// App is activebreak;caseUsageStatsManager.STANDBY_BUCKET_RARE:// App is rarely usedbreak;}
Encourage user engagement with meaningful notifications to avoid landing in the “rare” bucket.
Background Execution Limits
Starting from Android 8.0 (Oreo), background execution limits make Android power management stricter:
Background services can’t run freely.
Implicit broadcasts are restricted.
Solution: WorkManager to the Rescue
Java
WorkManagerworkManager = WorkManager.getInstance(context);OneTimeWorkRequestworkRequest = new OneTimeWorkRequest.Builder(MyWorker.class).build();workManager.enqueue(workRequest);
Replace IntentService with JobIntentService or WorkManager to ensure reliability.
Optimizing Notifications Under Power Management
Notifications are crucial for engagement, but Android power management policies may delay them if improperly handled.
Best Practices:
Use Firebase Cloud Messaging (FCM) with high-priority messages sparingly.
Avoid unnecessary wake-ups; reserve high-priority FCM for time-critical updates.
Use NotificationManager correctly to deliver timely, non-intrusive notifications.
Java
NotificationCompat.Builderbuilder = new NotificationCompat.Builder(this, CHANNEL_ID) .setSmallIcon(R.drawable.notification_icon) .setContentTitle("Update Available") .setContentText("New data ready to view!") .setPriority(NotificationCompat.PRIORITY_HIGH);
High-priority FCM bypasses Doze but excessive usage can get your app flagged.
Avoid Common Pitfalls
Don’t abuse foreground services. They drain battery and annoy users if misused.
Don’t request battery optimization exemptions unless absolutely necessary. Google Play has strict policies and most requests get denied.
Do leverage JobScheduler, WorkManager, and FCM effectively.
Do test under real conditions. Use adb shell dumpsys deviceidle to simulate Doze Mode and check your app’s behavior.
Conclusion
Building resilient Android apps means respecting Android power management rather than working around it. Focus on:
Using WorkManager for background tasks.
Optimizing notifications.
Monitoring app standby behavior.
By designing apps that adapt to Android’s power-saving mechanisms, you’ll deliver reliable experiences without draining users’ batteries.
If you’ve noticed your Android app getting delayed push notifications, or background tasks not running as expected, the culprit could be Android Standby Bucket.
This isn’t some hidden developer setting — it’s a key part of Android’s power management system. And if you want your app to work smoothly in the background without draining battery, you need to understand how the Standby Bucket works, how it categorizes apps, and what you can do to stay on Android’s good side.
Let’s break it all down in simple way.
What Is Android Standby Bucket?
The Android Standby Bucket is a power management feature introduced in Android 9 (Pie). It groups apps into “buckets” based on how frequently the user interacts with them.
Why..?
Because Android wants to optimize battery life. And background activity — like location updates, network calls, or jobs running silently — can suck up power fast.
So Android created a smart system that limits background access for apps the user rarely uses.
The Five Standby Buckets Explained
Here are the five standby buckets an app can fall into:
Active
The user is actively using the app.
No background restrictions.
Working Set
Used recently but not in the foreground now.
Minor restrictions apply.
Frequent
Used regularly but not daily.
Background access is more limited.
Rare
Used occasionally.
Significant background restrictions.
Restricted
Manually restricted or flagged by the system for battery drain.
Heavily limited in all background access.
Your app moves between these buckets dynamically based on user behavior — and that impacts what you can do in the background.
Why Should Developers Care?
If your app needs to do anything in the background — sync data, send reminders, update location — you must understand where your app stands in the Standby Bucket hierarchy.
Failing to adapt could mean:
Missed push notifications.
Jobs not running on time.
Background tasks being throttled or killed.
And ultimately, frustrated users.
How to Check Your App’s Bucket With Code
You can check which bucket your app is currently in using UsageStatsManager.
Kotlin
val usageStatsManager = getSystemService(Context.USAGE_STATS_SERVICE) as UsageStatsManagerval standbyBucket = usageStatsManager.appStandbyBucketwhen (standbyBucket) { UsageStatsManager.STANDBY_BUCKET_ACTIVE -> Log.d("Bucket", "App is Active") UsageStatsManager.STANDBY_BUCKET_WORKING_SET -> Log.d("Bucket", "App is in Working Set") UsageStatsManager.STANDBY_BUCKET_FREQUENT -> Log.d("Bucket", "App is Frequent") UsageStatsManager.STANDBY_BUCKET_RARE -> Log.d("Bucket", "App is Rare") UsageStatsManager.STANDBY_BUCKET_RESTRICTED -> Log.d("Bucket", "App is Restricted")else-> Log.d("Bucket", "Unknown Bucket")}
This snippet uses UsageStatsManager to get the current standby bucket. Based on that, you can log or trigger actions to adjust your app’s behavior accordingly.
How the Standby Bucket Impacts Background Activity
Here’s what each bucket means for your app’s background capabilities:
Bucket
Background Execution
Job Scheduling
Network Access
Active
No restrictions
Immediate
Unrestricted
Working Set
Minor delays
Slight delay
Slight delay
Frequent
Moderate limits
Scheduled with delay
Delayed
Rare
Severe limits
Deferred heavily
Heavily delayed
Restricted
Blocked
Blocked
Blocked
This directly impacts APIs like:
WorkManager
AlarmManager
JobScheduler
Firebase Cloud Messaging (FCM)
If you’re wondering why your background sync isn’t firing, check your bucket first.
How to Keep Your App in a Good Bucket
You can’t directly set the bucket, but you can influence it by keeping users engaged:
1. Encourage Regular Use
Design for stickiness. The more users interact with your app, the better your bucket position.
2. Send Relevant Notifications
Make sure your notifications lead to real engagement. Avoid spamming or your app could get demoted.
3. Use Foreground Services Wisely
For important tasks (like location tracking or media playback), run them in a foreground service with a visible notification.
4. Follow Background Execution Limits
Stick to Android’s guidelines. Use WorkManager for deferred tasks and ForegroundService for immediate ones.
Best Practices for Dealing With Standby Buckets
Test under all bucket conditions: Simulate lower buckets using ADB (see below).
Use JobScheduler.setRequiresDeviceIdle() carefully: It might never trigger if your app is in a low bucket.
Monitor your background task success rate: Adjust logic depending on current restrictions.
Simulating Buckets with ADB
You can force your app into a specific bucket for testing:
Kotlin
adb shell am set-standby-bucket com.yourapp.package rare
To reset:
Kotlin
adb shell am reset-standby-bucket com.yourapp.package
This is incredibly useful for QA and debugging.
Real-World Examples
Social Media Apps: Stay in Active/Working Set buckets due to frequent use, keeping messages and updates timely.
Fitness App Used Weekly: Dropped to Frequent or Rare, background syncs may be delayed, so design your UI to handle missing updates gracefully.
Single-Purpose Utility: Used once after installation, then falls to Rare or even Restricted. Background operations almost always deferred.
Conclusion
The Android Standby Bucket system is here to stay. It’s designed to protect user battery life while still allowing well-behaved apps to run efficiently.
By understanding how it works and adapting your app’s background behavior accordingly, you’ll build a better, more battery-friendly experience for your users.
Remember: apps that respect user attention and system resources will always win in the long run.
FAQs
What is Android Standby Bucket? It’s a power-saving feature that groups apps based on usage to limit background activity. Apps are bucketed as Active, Working Set, Frequent, Rare, or Restricted.
How does it impact apps? The lower the bucket, the more Android restricts background tasks, job scheduling, and network access.
How to check your app’s bucket? Use UsageStatsManager.appStandbyBucket to programmatically find the current bucket.
How to stay in a good bucket? Encourage engagement, follow background limits, and use foreground services wisely.