Amol Pawar

Types of CSS

What Are the 3 Types of CSS? Inline, Internal, and External Explained

If you’re just stepping into web development, one of the first things you’ll hear about is CSS. Short for Cascading Style Sheets, CSS is what gives your HTML pages their look and feel. But did you know there are 3 types of CSS? Yep — Inline, Internal, and External.

Each type has its own use case, pros, and quirks. In this post, we’ll break them down in simple language, show real examples, and help you understand when to use which type. Let’s get into it.

Why Do We Use CSS?

Before jumping into the types of CSS, let’s quickly cover why CSS is important. HTML structures the content of a page, but CSS styles it. That means fonts, colors, layouts, spacing, and responsiveness all come from CSS.

Without CSS, every webpage would look like a plain Word document.
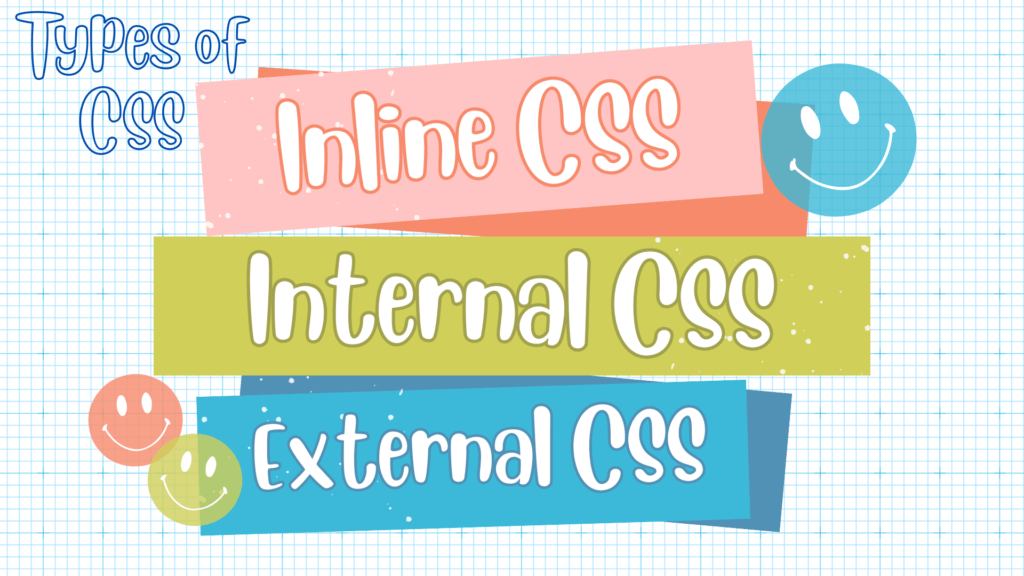
The 3 Types of CSS

When people talk about “types of CSS,” they’re referring to how CSS is applied to HTML. You can apply styles directly inside HTML tags, within the <head> of your HTML document, or in a separate file altogether.

Let’s walk through each one.

1. Inline CSS

Inline CSS is when you add styles directly to an HTML element using the style attribute.

HTML
<p style="color: red; font-size: 18px;">This is a red paragraph.</p>

Here,

  • The style is written inside the tag.
  • Useful for quick fixes or one-off changes.
  • Not ideal for managing styles across a whole site.

When to Use Inline CSS:

  • You need a fast, temporary tweak.
  • You’re testing or debugging.
  • You’re styling emails (some email clients only support inline styles).

Downsides:

  • Hard to maintain.
  • Breaks separation of concerns (HTML should structure, CSS should style).
  • Makes your code messy and repetitive.

2. Internal CSS

Internal CSS means placing your styles within a <style> tag in the <head> section of your HTML document.

HTML
<!DOCTYPE html>
<html>
<head>
  <style>
    p {
      color: blue;
      font-size: 16px;
    }
  </style>
</head>
<body>
  <p>This is a blue paragraph.</p>
</body>
</html>
  • Styles are defined in one place, at the top of the HTML file.
  • Affects all matching elements in that document.

When to Use Internal CSS:

  • You’re building a single-page website.
  • You want quick, page-specific styling.
  • You’re prototyping something quickly.

Downsides:

  • Styles don’t apply across multiple pages.
  • Hard to manage if your project grows.

3. External CSS

External CSS means writing your styles in a separate .css file and linking to it from your HTML.

style.css

CSS
p {
  color: green;
  font-size: 14px;
}

index.html

HTML
<!DOCTYPE html>
<html>
<head>
  <link rel="stylesheet" href="style.css">
</head>
<body>
  <p>This is a green paragraph.</p>
</body>
</html>
  • Styles live in their own file.
  • Keeps HTML clean and focused.
  • Ideal for large or multi-page websites.

When to Use External CSS:

  • You’re working on a website with more than one page.
  • You want reusable, scalable styles.
  • You care about site performance (external CSS can be cached by browsers).

Downsides:

  • Requires another HTTP request (though caching minimizes this).
  • Slightly more complex setup for beginners.

Which Type of CSS Should You Use?

Here’s a quick breakdown:

TypeBest ForNot Great For
InlineSmall tweaks, testing, emailsLarge or consistent styling
InternalSingle-page apps or quick demosMulti-page sites
ExternalScalable, maintainable websitesVery small, one-off projects

Most professional websites rely primarily on external CSS because it keeps things organized and efficient. But knowing all types of CSS gives you flexibility.

Conclusion 

Understanding the types of CSS is a must for anyone who wants to write clean, maintainable, and scalable front-end code. While all three have their place, external CSS is usually the go-to for serious web development.

Start by experimenting with each one. Try adding some inline styles, then move to internal, and finally separate your styles out with external CSS. You’ll get a feel for which approach works best in different scenarios.

Generics and Type Safety in Java

Generics and Type Safety in Java: A Beginner’s Guide

Java is a strongly typed language, meaning it requires explicit type definitions to ensure reliability and stability in applications. One of the most powerful features Java provides to enforce type safety in Java is Generics. This guide will help you understand generics, how they enhance type safety, and how to use them effectively.

What Are Generics in Java?

Generics allow developers to create classes, interfaces, and methods that operate on different types while maintaining type safety in Java. With generics, you can write flexible and reusable code without compromising the reliability of type enforcement.

For example, before generics were introduced, Java collections stored objects as raw types, requiring explicit casting, which was both error-prone and unsafe.

Without Generics (Before Java 5)

Kotlin
import java.util.ArrayList;

public class WithoutGenerics {
    public static void main(String[] args) {
        ArrayList list = new ArrayList(); // Raw type list
        list.add("Hello");
        list.add(100); // No type safety
        String text = (String) list.get(0); // Safe
        String number = (String) list.get(1); // Runtime error: ClassCastException
    }
}

Have you noticed Problem Here:

  • The ArrayList stores any object type (String, Integer, etc.), leading to runtime errors.
  • Type casting is required when retrieving elements, otherwise, which increases the chance of ClassCastException.

How Generics Improve Type Safety in Java

With generics, you specify the type when defining a collection, ensuring only valid data types are added.

With Generics (Java 5 and Later)

Kotlin
import java.util.ArrayList;

public class WithGenerics {
    public static void main(String[] args) {
        ArrayList<String> list = new ArrayList<>(); // Type-safe list
        list.add("Hello");
        // list.add(100); // Compile-time error, preventing mistakes
        String text = list.get(0); // No explicit casting required
        System.out.println(text);
    }
}

Benefits of Generics:

  1. Compile-time Type Checking: Prevents type-related errors at compile time instead of runtime.
  2. No Need for Type Casting: Eliminates unnecessary type conversion, reducing code complexity.
  3. Code Reusability: Generic methods and classes can work with multiple types without duplication.

Using Generics in Classes

You can define generic classes to work with different data types.

Creating a Generic Class

A generic class is a class that can work with any data type. You define it using type parameters inside angle brackets (<>).

Kotlin
class Box<T> { // T is a placeholder for a type
    private T value;
    
    public void setValue(T value) {
        this.value = value;
    }
    
    public T getValue() {
        return value;
    }
}

public class GenericClassExample {
    public static void main(String[] args) {
        Box<String> stringBox = new Box<>();
        stringBox.setValue("Java Generics");
        System.out.println(stringBox.getValue());
        Box<Integer> intBox = new Box<>();
        intBox.setValue(100);
        System.out.println(intBox.getValue());
    }
}

Here,

  • T represents a generic type that is replaced with a real type (e.g., String or Integer) when used.
  • The class works for any data type while ensuring type safety in Java.

Generic Methods

Generic methods allow flexibility by defining methods that work with various types.

Creating a Generic Method

You can define methods that use generics, making them more reusable.

Kotlin
class GenericMethodExample {
    public static <T> void printArray(T[] elements) {
        for (T element : elements) {
            System.out.print(element + " ");
        }
        System.out.println();
    }
    
    public static void main(String[] args) {
        Integer[] intArray = {1, 2, 3, 4, 5};
        String[] strArray = {"A", "B", "C"};
        
        printArray(intArray); // Works with Integer array
        printArray(strArray); // Works with String array
    }
}

Here,

  • <T> before the method name defines a generic type.
  • The method works with any array type (Integer, String, etc.), enhancing type safety in Java.

Bounded Type Parameters

Sometimes, you may want to restrict the generic type to a specific category, such as only numbers. This is done using bounded type parameters.

Restricting to Number Types

Kotlin
class Calculator<T extends Number> { // T must be a subclass of Number
    private T num;
    
    public Calculator(T num) {
        this.num = num;
    }
    
    public double square() {
        return num.doubleValue() * num.doubleValue();
    }
}

public class BoundedGenericsExample {
    public static void main(String[] args) {
        Calculator<Integer> intCalc = new Calculator<>(5);
        System.out.println("Square: " + intCalc.square());
        Calculator<Double> doubleCalc = new Calculator<>(3.5);
        System.out.println("Square: " + doubleCalc.square());
    }
}
  • T extends Number ensures that T can only be a subclass of Number (e.g., Integer, Double).
  • This ensures type safety in Java, preventing incompatible types like String from being used.

Wildcards in Generics

Wildcards (?) provide flexibility when working with generics. They allow methods to accept unknown generic types.

Kotlin
import java.util.*;

class WildcardExample {
    public static void printList(List<?> list) {
        for (Object obj : list) {
            System.out.println(obj);
        }
    }
    public static void main(String[] args) {
        List<Integer> intList = Arrays.asList(1, 2, 3);
        List<String> strList = Arrays.asList("A", "B", "C");
        
        printList(intList);
        printList(strList);
    }
}

Why Use Wildcards?

  • ? allows passing any generic type.
  • Helps achieve type safety in Java while maintaining flexibility.

Conclusion

Generics are a crucial feature in Java, enhancing type safety in Java by detecting errors at compile-time and reducing runtime exceptions. By using generics, developers can create reusable, maintainable, and efficient code. Whether you use generic classes, methods, bounded types, or wildcards, generics make Java programming safer and more powerful.

PhantomReference in Java

PhantomReference in Java: Unlocking the Secrets of Efficient Memory Management

Memory management is a crucial aspect of Java programming, ensuring that unused objects are efficiently cleared to free up resources. While Java’s built-in garbage collector (GC) handles most of this automatically, advanced scenarios require finer control. This is where PhantomReference in Java comes into play.

In this blog post, we will explore PhantomReference in Java, how it differs from other reference types, and how it can be used to enhance memory management. Let’s dive in!

What is PhantomReference in Java?

A PhantomReference is a type of reference in Java that allows you to determine precisely when an object is ready for finalization. Unlike SoftReference and WeakReference, a PhantomReference does not prevent an object from being collected. Instead, it serves as a mechanism to perform post-mortem cleanup operations after the object has been finalized.

Key Characteristics:
  • No Direct Access: You cannot retrieve the referenced object via get(). It always returns null.
  • Used for Cleanup: It is typically used for resource management, such as closing files or releasing memory in native code.
  • Works with ReferenceQueue: The object is enqueued in a ReferenceQueue when the JVM determines it is ready for GC.

How PhantomReference Differs from Other References

Java provides four types of references:

  • Strong Reference: The default type; prevents garbage collection.
  • Weak Reference: Allows an object to be garbage collected if no strong references exist.
  • Soft Reference: Used for memory-sensitive caches; objects are collected only when memory is low.
  • Phantom Reference: Unlike other references, it does not prevent garbage collection at all. Instead, it is used to run cleanup actions after an object has been collected, often in conjunction with a ReferenceQueue.

Implementing PhantomReference in Java

To use PhantomReference in Java, we must associate it with a ReferenceQueue, which holds references to objects that have been marked for garbage collection.

Java
import java.lang.ref.PhantomReference;
import java.lang.ref.Reference;
import java.lang.ref.ReferenceQueue;

public class PhantomReferenceExample {
    public static void main(String[] args) throws InterruptedException {
        ReferenceQueue<Resource> queue = new ReferenceQueue<>();
        Resource resource = new Resource();
        PhantomReference<Resource> phantomRef = new PhantomReference<>(resource, queue);

        // Remove strong reference
        resource = null;
        System.gc(); // Suggest GC
       
        // Wait for the reference to be enqueued
        while (queue.poll() == null) {
            System.gc();
            Thread.sleep(100);
        }
        
        System.out.println("PhantomReference enqueued, performing cleanup...");
    }
}

class Resource {
    void cleanup() {
        System.out.println("Cleaning up resources...");
    }
}

Here,

  1. We create a ReferenceQueue to hold PhantomReference objects after GC determines they are unreachable.
  2. A PhantomReference to a Resource object is created and linked to the queue.
  3. The strong reference to the Resource object is removed (resource = null), allowing it to be garbage collected.
  4. The garbage collector runs (System.gc()), and after a delay (Thread.sleep(1000)), we check the ReferenceQueue.
  5. If the PhantomReference is enqueued, we perform cleanup operations before removing the reference completely.

Why Use PhantomReference?

The main reason for using PhantomReference in Java is to gain better control over memory cleanup beyond what the garbage collector offers. Some use cases include:

  1. Monitoring Garbage Collection: Detect when an object is about to be collected.
  2. Resource Cleanup: Free up native resources after Java objects are finalized.
  3. Avoiding finalize() Method: finalize() is discouraged due to its unpredictable execution; PhantomReference provides a better alternative.

Conclusion

PhantomReference in Java is a powerful tool for managing memory efficiently. While it may not be needed in everyday development, understanding how it works helps in writing better memory-aware applications. By combining PhantomReference with a ReferenceQueue, you can ensure timely resource cleanup and improve your application’s performance.

If you’re working with large objects, native resources, or need to track garbage collection behavior, PhantomReference in Java provides a robust and flexible solution.

Final vs Finally vs Finalize in Java

Final vs Finally vs Finalize in Java: The Ultimate Guide to Avoid Confusion

Java developers often get confused between final, finally, and finalize. These three terms might sound similar, but they serve completely different purposes. If you’ve ever struggled to understand their differences, this guide is for you!

By the end of this post, you’ll have a clear understanding of final vs finally vs finalize in Java and how to use each one correctly. Let’s dive in!

1. What is final in Java?

The final keyword in Java is used for constants, method restrictions, and inheritance control. It can be applied to variables, methods, and classes.

a) final with Variables (Constant Values)

When a variable is declared final, its value cannot be changed once assigned.

Java
public class FinalVariableExample {
    final int MAX_VALUE = 100; // Constant value
    
    void display() {
        // MAX_VALUE = 200; // This will cause a compilation error
        System.out.println("Max Value: " + MAX_VALUE);
    }
}

The MAX_VALUE variable is declared as final, so its value cannot be modified.

b) final with Methods (Prevent Overriding)

A final method cannot be overridden by subclasses.

Java
class Parent {
    final void show() {
        System.out.println("This is a final method.");
    }
}

class Child extends Parent {
    // void show() { // This will cause a compilation error
    //     System.out.println("Cannot override a final method");
    // }
}

The show() method in the Parent class is marked final, preventing the Child class from overriding it.

c) final with Classes (Prevent Inheritance)

A class declared as final cannot be extended.

Java
final class FinalClass {
    void display() {
        System.out.println("This is a final class.");
    }
}

// class SubClass extends FinalClass { // This will cause a compilation error
// }

The FinalClass cannot be extended by any subclass.

2. What is finally in Java?

The finally block in Java is used to ensure that important code executes, regardless of exceptions. It is primarily used with try-catch blocks to handle exceptions.

Java
public class FinallyExample {
    public static void main(String[] args) {
        try {
            int result = 10 / 0; // This will cause an exception
        } catch (ArithmeticException e) {
            System.out.println("Exception caught: " + e.getMessage());
        } finally {
            System.out.println("Finally block executed!");
        }
    }
}

Output:

Java
Exception caught: / by zero
Finally block executed!

The finally block runs no matter what happens in the try-catch block. This is useful for closing resources like database connections or file streams.

3. What is finalize() in Java?

The finalize() method is used for garbage collection. It is called by the Garbage Collector before an object is destroyed to perform cleanup operations.

Java
class FinalizeExample {
    protected void finalize() {
        System.out.println("Finalize method called before garbage collection.");
    }

    public static void main(String[] args) {
        FinalizeExample obj = new FinalizeExample();
        obj = null; // Making object eligible for garbage collection
        System.gc(); // Requesting garbage collection
        System.out.println("End of main method.");
    }
}

Output (may vary depending on JVM execution):

Java
End of main method.
Finalize method called before garbage collection.
  • The finalize() method is called before an object is garbage collected but not guaranteed to execute immediately or at all.
  • Calling System.gc() only suggests garbage collection to the JVM, but it does not force it.
  • Due to unpredictability and performance issues, finalize() has been deprecated in Java 9 and removed (marked as remove) in Java 18.
Alternatives to finalize():
  • Try-with-resources (AutoCloseable) – For handling resources like files, sockets, and streams.
  • java.lang.ref.Cleaner (Java 9+) – A more reliable way to register cleanup actions when objects become unreachable.
Important Note:

The use of finalize() is strongly discouraged in modern Java programming. Developers should use explicit resource management instead of relying on garbage collection for cleanup.

Final vs Finally vs Finalize in Java: Key Differences

Featurefinalfinallyfinalize()
UsageVariable, method, or class modifierBlock in exception handlingMethod in garbage collection
EffectRestricts variable reassignment, method overriding, and class inheritanceEnsures execution of critical codeAllows cleanup before object removal
ExecutionCompile-timeAlways runs after try-catchCalled by garbage collector
PurposeRestrictionCode execution assuranceCleanup

When to Use Final, Finally, and Finalize?

  • Use final when you want to create constants, prevent method overriding, or restrict class inheritance.
  • Use finally when you need to execute important code regardless of exceptions, like closing resources.
  • Use finalize() only if you need to clean up resources before garbage collection, though it is now discouraged.

Conclusion

Understanding final vs finally vs finalize in Java is crucial for writing efficient and error-free Java programs. While final is used for constants, method restrictions, and inheritance prevention, finally ensures essential code execution, and finalize() helps with garbage collection (though deprecated in Java 9+).

custom exceptions

Custom Exceptions vs. Standard Exceptions in Java: When to Extend and When Not To

Java provides a robust exception handling mechanism that helps developers write reliable and maintainable code. While Java’s standard exceptions cover many common error scenarios, sometimes you need something more specific to your application’s needs. This is where custom exceptions in Java come into play. But when should you create a custom exception, and when is it unnecessary? Let’s explore this in depth.

What Are Standard Exceptions in Java?

Java has a rich hierarchy of built-in exceptions that developers can use to handle different errors. These standard exceptions fall into two main categories:

1. Checked Exceptions — Must be handled using try-catch or declared using throws.

  • Example: IOException, SQLException

2. Unchecked Exceptions (Runtime Exceptions) — Do not require explicit handling.

  • Example: NullPointerException, IndexOutOfBoundsException

Using standard exceptions is often the best choice because they are well-documented and understood by developers. However, they might not always convey specific application-related issues effectively.

When to Use Custom Exceptions in Java

Custom exceptions are useful when you need to represent domain-specific errors that are not covered by standard exceptions. Here are some scenarios where custom exceptions make sense:

1. When Standard Exceptions Are Too Generic

Standard exceptions may not always provide enough clarity. For instance, if your application processes payments, throwing a generic Exception or IllegalArgumentException isn’t informative. A PaymentProcessingException makes the error clearer.

2. When You Need to Add Extra Information

A custom exception allows you to include additional details about an error, such as error codes, messages, or even metadata.

3. When You Want to Enforce Business Rules

Custom exceptions help enforce specific business logic. For example, if a user tries to withdraw more money than available, you might throw an InsufficientFundsException instead of a generic RuntimeException.

4. When You Need to Handle Exceptions Differently

If your application has a centralized error-handling mechanism, custom exceptions can be helpful in distinguishing different types of errors.

How to Create a Custom Exception in Java

Creating a custom exception in Java is simple. You can extend either Exception (for checked exceptions) or RuntimeException (for unchecked exceptions).

Creating a Checked Custom Exception

Java
class InvalidAgeException extends Exception {
    public InvalidAgeException(String message) {
        super(message);
    }
}

public class CustomExceptionExample {
    public static void validateAge(int age) throws InvalidAgeException {
        if (age < 18) {
            throw new InvalidAgeException("Age must be 18 or above.");
        }
    }
    public static void main(String[] args) {
        try {
            validateAge(16);
        } catch (InvalidAgeException e) {
            System.out.println("Caught exception: " + e.getMessage());
        }
    }
}

Here,

  • InvalidAgeException extends Exception, making it a checked exception.
  • The constructor passes a custom message to the superclass (Exception).
  • The validateAge method throws InvalidAgeException if age is below 18.
  • The exception is caught in main and handled gracefully.

Creating an Unchecked Custom Exception

Java
class DatabaseConnectionException extends RuntimeException {
    public DatabaseConnectionException(String message) {
        super(message);
    }
}

public class UncheckedCustomExceptionExample {
    public static void connectToDatabase(boolean connectionStatus) {
        if (!connectionStatus) {
            throw new DatabaseConnectionException("Failed to connect to the database.");
        }
    }
    public static void main(String[] args) {
        connectToDatabase(false);
    }
}

Here,

  • DatabaseConnectionException extends RuntimeException, making it unchecked.
  • No need to declare it using throws since unchecked exceptions don’t require explicit handling.
  • If connectToDatabase(false) is called, an exception is thrown.

When NOT to Use Custom Exceptions

While custom exceptions in Java are useful, overusing them can lead to unnecessary complexity. Here are cases where they may not be needed:

1. When a Standard Exception Suffices

If a standard exception like IllegalArgumentException or NullPointerException properly conveys the issue, using a custom exception is redundant.

Java
public void setAge(int age) {
    if (age < 0) {
        throw new IllegalArgumentException("Age cannot be negative.");
    }
}

There’s no need for a NegativeAgeException when IllegalArgumentException works perfectly.

2. When They Add Unnecessary Complexity

If an exception doesn’t add meaningful information or handling logic, it might not be worth creating.

3. When Logging and Debugging Are Not Improved

If a custom exception doesn’t make debugging easier or doesn’t offer additional insights, it may not be necessary.

Best Practices for Custom Exceptions

  1. Keep Custom Exceptions Specific — Avoid generic names like MyAppException; use names that reflect the issue, such as UserNotFoundException.
  2. Extend the Right Class — Use Exception for checked exceptions and RuntimeException for unchecked exceptions.
  3. Include Helpful Messages — Provide meaningful messages to help with debugging.
  4. Document Your Exceptions — Ensure other developers understand when and why to use them.
  5. Avoid Creating Too Many Exceptions — Use them only when they add real value.

Conclusion

Custom exceptions in Java are powerful when used appropriately. They provide clarity, enforce business logic, and enhance maintainability. However, standard exceptions should be preferred when they adequately describe an error. The key is to strike the right balance — use custom exceptions only when they genuinely improve code readability, debugging, and error handling.

Checked Exceptions

Checked Exceptions in Java: What They Are and How They Work

When writing Java programs, handling errors is an essential part of creating robust and reliable applications. One important concept in Java’s error-handling mechanism is checked exceptions. If you’re new to Java or need a refresher, this guide will walk you through what checked exceptions are, how they work, and how to handle them effectively.

What Are Checked Exceptions in Java?

Checked exceptions in Java are a category of exceptions that must be either caught or declared in the method signature using the throws keyword. They are part of Java’s mechanism to enforce error handling at compile-time, ensuring that developers acknowledge and manage potential problems before running the program.

Unlike unchecked exceptions, which arise due to programming errors (such as NullPointerException or ArrayIndexOutOfBoundsException), checked exceptions typically indicate recoverable conditions like missing files, failed network connections, or invalid user input.

Let’s understand this with a simple example.

Imagine you are booking a flight online. There are two possible situations:

  1. You enter correct details, and the ticket is booked successfully.
  2. You enter an incorrect credit card number, and the system stops the booking process, showing an error.

In Java terms:

  • Booking the flight successfully is like a normal method execution.
  • Entering an invalid card number is like a checked exception, because the system knows this issue could happen and forces you to handle it (e.g., by showing an error message).

How Does Java Enforce Checked Exceptions?

When writing Java code, some operations have a high chance of failing, like:

  • Reading a file (the file may not exist) → IOException
  • Connecting to a database (the database might be down) → SQLException
  • Waiting for a thread to completeInterruptedException

Since these errors are expected, Java forces you to either:

  • Handle them using try-catch
  • Declare them using throws in the method signature

Let’s say we want to read a file. There’s a chance the file doesn’t exist, so Java forces us to handle this situation.

Without Handling (Compilation Error)

Java
import java.io.FileReader;

public class CheckedExceptionExample {
    public static void main(String[] args) {
        FileReader file = new FileReader("path\data.txt"); // Compilation Error!
    }
}

Error: Unhandled exception: java.io.FileNotFoundException
 Java stops compilation because we didn’t handle the exception. Also the compiler suggests two options: the first one is to surround the code with a try-catch block, and the second is to declare the exception using the throws keyword in the method signature.

Handling with try-catch

We handle the error inside the method using try-catch:

Java
import java.io.FileReader;
import java.io.IOException;

public class CheckedExceptionExample {
    public static void main(String[] args) {
        try {
            FileReader file = new FileReader("path\data.txt"); 
            System.out.println("File opened successfully.");
        } catch (IOException e) {
            System.out.println("Error: File not found.");
        }
    }
}

Output if file exists: File opened successfully.
Output if file is missing: Error: File not found.

Handling with throws (Delegating the Exception)

Instead of handling it inside the method, we can let the caller handle it by declaring throws in the method signature.

Java
import java.io.FileReader;
import java.io.IOException;

public class CheckedExceptionExample {
    public static void main(String[] args) throws IOException {
        FileReader file = new FileReader("path\data.txt"); 
        System.out.println("File opened successfully.");
    }
}

This approach is useful for propagating exceptions to higher-level methods where they can be handled appropriately.

Why Are Checked Exceptions Important?

Checked exceptions serve an important role in Java by enforcing better error handling. Here’s why they matter:

  1. Compile-Time Safety: They prevent runtime failures by ensuring errors are anticipated and handled during development.
  2. Encourages Robust Code: Developers are forced to think about possible failure scenarios and how to deal with them.
  3. Improves Code Maintainability: Explicit exception declarations make it clear which methods can fail, improving readability and maintainability.

Conclusion

Checked exceptions in Java play a crucial role in enforcing proper error handling at compile-time. By understanding how they work and following best practices, you can write cleaner, more reliable Java code. Whether you use try-catch blocks or declare exceptions with throws, handling checked exceptions properly ensures your applications run smoothly and recover gracefully from potential issues.

By integrating these techniques into your Java development workflow, you’ll be better prepared to handle unexpected situations, making your applications more robust and user-friendly.

Unchecked Exceptions in Java

Unchecked Exceptions in Java: What They Are

Java is a powerful programming language that provides robust error handling mechanisms through exceptions. Exceptions in Java are classified into checked exceptions and unchecked exceptions. In this blog post, we’ll dive deep into unchecked exceptions in java, focusing on RuntimeException, and explore how they work, when to use them, and best practices.

What Are Unchecked Exceptions in Java?

Unchecked exceptions in Java are exceptions that occur during the execution of a program and do not need to be explicitly declared or handled. They are subclasses of RuntimeException, which itself extends Exception. Unlike checked exceptions, the compiler does not force you to handle unchecked exceptions, giving developers more flexibility.

Imagine you are driving a car:

  • If you run out of fuel before starting, you already know you’ll need to refill (like a checked exception, where Java warns you in advance).
  • If you suddenly get a flat tire while driving, it’s unexpected (like an unchecked exception, because Java doesn’t force you to check for it).

Unchecked exceptions usually happen due to coding mistakes like dividing by zero, accessing an invalid index, or dereferencing null.

Key Characteristics of Unchecked Exceptions:

  • They occur at runtime.
  • They are not required to be handled using try-catch or declared with throws
  • They indicate programming errors, such as logical flaws or improper API usage.
  • Examples include NullPointerException, ArrayIndexOutOfBoundsException, and IllegalArgumentException.

Common Causes of Unchecked Exceptions

Unchecked exceptions often arise from:

  1. Null references — Trying to access methods or fields of a null object leads to a NullPointerException.
  2. Invalid array access — Accessing an index beyond the array’s length results in ArrayIndexOutOfBoundsException.
  3. Illegal operations — Dividing by zero throws an ArithmeticException.
  4. Invalid casting — Trying to cast an object to an incompatible type leads to ClassCastException.
  5. Improper argument usage — Passing an invalid argument to a method can trigger IllegalArgumentException.

How to Handle Unchecked Exceptions in Java?

Although unchecked exceptions don’t require explicit handling, it is good practice to write defensive code to avoid them. Here are some best practices:

1. Use Null Checks

Before using an object, always ensure it is not null to avoid NullPointerException.

2. Validate Input Arguments

Check method parameters before processing them.

3. Use Try-Catch Blocks Sparingly

Try-catch blocks should not be overused for unchecked exceptions but can be useful in specific cases.

Difference Between Checked and Unchecked Exceptions

Understanding the distinction between checked and unchecked exceptions is crucial for writing efficient Java code.

FeatureChecked ExceptionsUnchecked Exceptions
InheritanceExtends Exception (except RuntimeException)Extends RuntimeException
Compile-time CheckingChecked by the compilerNot checked by the compiler
Handling RequirementMust be handled or declaredNo mandatory handling
Use CaseRepresent recoverable conditions (e.g., IOException)Indicate programming errors (e.g., NullPointerException)

Should You Catch Unchecked Exceptions in Java?

Generally, it’s best to avoid catching unchecked exceptions unless you’re implementing a global exception handler. Instead, focus on writing clean, error-free code by using input validation and proper null checks. However, in web applications or frameworks, handling unchecked exceptions globally can enhance user experience by providing clear error messages rather than allowing the application to crash.

Conclusion

Unchecked exceptions in Java, particularly those derived from RuntimeException, provide flexibility but also require responsible usage. They indicate programming mistakes that should be fixed rather than caught. By following best practices like validating inputs, using meaningful messages, and logging exceptions properly, developers can write robust and maintainable Java applications.

Mastering MVVM Architecture

Mastering MVVM Architecture in Android: A Complete Guide

Modern Android development demands scalable, maintainable, and testable architectures, and MVVM (Model-View-ViewModel) has emerged as the gold standard. It helps in structuring code in a way that ensures a clean separation of concerns, making it easier to manage UI, business logic, and data operations.

In this guide, we’ll take an in-depth look at MVVM, its benefits, how to implement it using Jetpack Compose, and advanced concepts like dependency injection, UI state handling, and testing. Let’s dive in!

What is MVVM?

MVVM (Model-View-ViewModel) is an architectural pattern that separates the presentation layer (UI) from the business logic and data handling. This separation enhances modularity, making the app easier to maintain and test.

MVVM Components

  1. Model: Represents the data layer (API, database, repositories) and business logic.
  2. View: The UI layer (Activity, Fragment, or Composable functions in Jetpack Compose).
  3. ViewModel: Acts as a bridge between View and Model, holding UI-related data and surviving configuration changes.

How MVVM Works

  1. The View observes data from the ViewModel.
  2. The ViewModel fetches data from the Model.
  3. The Model retrieves data from an API, database, or local cache.
  4. The ViewModel exposes the data, and the View updates accordingly.

Why Use MVVM?

  • Separation of Concerns — Keeps UI and business logic separate.
  • Better Testability — ViewModel can be unit tested without UI dependencies.
  • Lifecycle Awareness — ViewModel survives configuration changes.
  • Scalability — Works well with large-scale applications.
  • Compatibility with Jetpack Compose — Supports modern UI development in Android.

Implementing MVVM in Android with Jetpack Compose

Let’s implement a simple MVVM architecture using Jetpack Compose.

Step 1: Model (Repository Layer)

Kotlin
class UserRepository {
    fun getUsers(): List<String> {
        return listOf("Amol", "Akshay", "Swapnil")
    }
}

Step 2: ViewModel

Kotlin
class UserViewModel : ViewModel() {
    private val repository = UserRepository()
    private val _users = MutableStateFlow<List<String>>(emptyList())
    val users: StateFlow<List<String>> = _users

    init {
        fetchUsers()
    }

    private fun fetchUsers() {
        _users.value = repository.getUsers()
    }
}

Step 3: View (Jetpack Compose UI)

Kotlin
@Composable
fun UserScreen(viewModel: UserViewModel = viewModel()) {
    val users by viewModel.users.collectAsState()
    LazyColumn {
        items(users) { user ->
            Text(text = user, fontSize = 20.sp, modifier = Modifier.padding(16.dp))
        }
    }
}

This basic example sets up MVVM with a repository, ViewModel, and a UI that observes data changes.

Dependency Injection in MVVM (Using Hilt)

To make the architecture scalable, we use Hilt for dependency injection.

Step 1: Add Dependencies

Kotlin
dependencies {
    implementation "androidx.hilt:hilt-navigation-compose:1.1.0"
    implementation "com.google.dagger:hilt-android:2.44"
    kapt "com.google.dagger:hilt-compiler:2.44"
}

Step 2: Enable Hilt in the Application Class

Kotlin
@HiltAndroidApp
class MyApp : Application()

Step 3: Inject Repository into ViewModel

Kotlin
@HiltViewModel
class UserViewModel @Inject constructor(private val repository: UserRepository) : ViewModel() {
    private val _users = MutableStateFlow<List<String>>(emptyList())
    val users: StateFlow<List<String>> = _users

    init {
        fetchUsers()
    }

    private fun fetchUsers() {
        _users.value = repository.getUsers()
    }
}

Step 4: Inject ViewModel into Composable

Kotlin
@Composable
fun UserScreen(viewModel: UserViewModel = hiltViewModel()) {
    val users by viewModel.users.collectAsState()
    
    LazyColumn {
        items(users) { user ->
            Text(text = user, fontSize = 20.sp, modifier = Modifier.padding(16.dp))
        }
    }
}

LiveData vs StateFlow: Which One to Use?

Best Practice: Use StateFlow with Jetpack Compose because it integrates better with collectAsState().

Handling UI State in MVVM

To manage loading, success, and error states:

Kotlin
sealed class UIState<out T> {
    object Loading : UIState<Nothing>()
    data class Success<T>(val data: T) : UIState<T>()
    data class Error(val message: String) : UIState<Nothing>()
}

Modify ViewModel:

Kotlin
class UserViewModel : ViewModel() {
    private val _users = MutableStateFlow<UIState<List<String>>>(UIState.Loading)
    val users: StateFlow<UIState<List<String>>> = _users

    fun fetchUsers() {
        viewModelScope.launch {
            try {
                val data = repository.getUsers()
                _users.value = UIState.Success(data)
            } catch (e: Exception) {
                _users.value = UIState.Error("Failed to load users")
            }
        }
    }
}

In UI:

Kotlin
when (state) {
    is UIState.Loading -> CircularProgressIndicator()
    is UIState.Success -> LazyColumn { items(state.data) { user -> Text(user) } }
    is UIState.Error -> Text(state.message, color = Color.Red)
}

Unit Testing MVVM Components

Unit testing is important in MVVM to ensure reliability.

Test ViewModel

Add testing dependencies:

Kotlin
testImplementation "junit:junit:4.13.2"
testImplementation "org.jetbrains.kotlinx:kotlinx-coroutines-test:1.6.4"
testImplementation "io.mockk:mockk:1.13.3"

Create a UserViewModelTest file:

Kotlin
@ExperimentalCoroutinesApi
class UserViewModelTest {

    private lateinit var viewModel: UserViewModel
    private val repository = mockk<UserRepository>()

    @Before
    fun setUp() {
        every { repository.getUsers() } returns listOf("Amol", "Akshay", "Swapnil")

        viewModel = UserViewModel(repository)
    }

    @Test
    fun `fetchUsers updates users state correctly`() {
       // We can also call the body of setUp() here, which is useful for individual test functions that need more customization.
        assert(viewModel.users.value is UIState.Success)
    }
}

This tests that fetchUsers() properly updates the UI state.

Conclusion

MVVM architecture enhances modularity, testability, and scalability in Android development. By using Jetpack Compose, Hilt for DI, StateFlow for state management, and UI state handling, we can build robust and maintainable applications.

The Ultimate Guide to Android Basics

The Ultimate Guide to Android Basics: Architecture, Components, Development, and More

Android is the world’s most popular mobile operating system, powering billions of devices worldwide. Whether you’re an aspiring developer or just curious about how Android works, understanding the fundamentals is crucial. This in-depth guide covers everything from Android’s architecture to app development essentials and best practices. Let’s dive in!

What is Android?

Android is an open-source operating system developed by Google, based on the Linux kernel. It provides a flexible ecosystem for developers to build mobile applications and supports a wide range of devices, including smartphones, tablets, smart TVs, and even wearables.

Android Architecture

Android’s architecture consists of multiple layers, each playing a critical role in its functionality. Here’s a breakdown:

1. Linux Kernel

At the core of Android is the Linux kernel, which manages low-level operations like memory management, process scheduling, security, and hardware communication.

2. Hardware Abstraction Layer (HAL)

HAL provides standard interfaces that allow the Android OS to communicate with different hardware components like cameras, sensors, and Bluetooth.

3. Native Libraries

These libraries include essential components like OpenGL (for graphics rendering), SQLite (database storage), and WebKit (browser engine).

4. Android Runtime (ART)

Android Runtime (ART) is responsible for executing applications. It uses Just-In-Time (JIT) and Ahead-Of-Time (AOT) compilation to optimize app performance.

5. Application Framework

This layer provides APIs and services for developers to build and manage applications, including:

  • Activity Manager: Controls app lifecycle and navigation.
  • Content Providers: Manages shared data between apps.
  • Resource Manager: Handles UI elements like layouts and strings.

6. Applications

At the top of the stack, we have the user-facing applications, including built-in Google apps (Phone, Messages, Maps) and third-party apps from the Play Store.

Core Android Components

Android applications are built using four main components:

1. Activities

An activity represents a single screen in an app. It contains the UI elements that users interact with. Activities follow a lifecycle, managed through methods like onCreate(), onResume(), and onDestroy().

2. Services

Services run in the background without a user interface. They are used for tasks like playing music or fetching data.

3. Broadcast Receivers

These listen for system-wide broadcast messages like battery low alerts or network connectivity changes.

4. Content Providers

Content providers manage shared data and allow different apps to access it securely, such as the Contacts or MediaStore databases.

Getting Started with Android Development

To start building Android applications, you need the right tools and languages.

Programming Languages

  • Kotlin: The preferred language for Android development, offering concise and expressive syntax.
  • Java: The traditional language, still widely used and supported.

Development Tools

  • Android Studio: The official IDE for Android development.
  • Android SDK (Software Development Kit): Provides the tools and libraries needed to build Android apps.
  • Gradle: Manages project dependencies and build automation.

AndroidManifest.xml

This file declares essential app information like activities, permissions, and services.

Building User Interfaces in Android

Android provides various UI components to design engaging applications.

Layouts

  • LinearLayout: Arranges elements in a single row or column.
  • ConstraintLayout: A flexible layout with constraints for responsive design.
  • RelativeLayout: Allows positioning elements relative to each other.

Common UI Elements

  • TextView: Displays text.
  • EditText: Accepts user input.
  • Button: Triggers actions when clicked.
  • RecyclerView: Efficiently displays large lists or grids.

Fragments

Fragments are modular UI components that allow flexible designs, especially for tablets and large-screen devices.

Understanding Android Lifecycle

Activities and fragments follow a structured lifecycle to manage user interactions efficiently. Key methods include:

  • onCreate(): Called when the activity is first created.
  • onStart(): When the activity becomes visible.
  • onResume(): When the user interacts with the activity.
  • onPause(): When the activity goes into the background.
  • onStop(): When the activity is no longer visible.
  • onDestroy(): When the activity is destroyed.

Data Storage in Android

Android provides multiple storage options based on application needs:

1. Shared Preferences

Used to store small key-value pairs, ideal for settings and preferences.

2. SQLite Database

A lightweight, local database for structured data storage.

3. Room Database

An abstraction layer over SQLite, making database management easier with an ORM approach.

4. Cloud & Firebase Storage

For cloud-based data storage and real-time updates.

Networking in Android

Most apps require network communication. Popular libraries include:

  • Retrofit: A type-safe HTTP client for interacting with APIs.
  • Volley: A fast networking library for handling multiple requests.
  • OkHttp: A low-level HTTP client for efficient network calls.

Security and Permissions

Android enforces strict security measures to protect user data.

Runtime Permissions

Apps must request permissions at runtime for sensitive actions like accessing the camera, location, or contacts.

Encryption

Ensures data security during storage and transmission.

ProGuard & R8

Used to minify and obfuscate code, making reverse engineering difficult.

Publishing Your Android App

Once your app is ready, follow these steps to publish it:

1. Google Play Console

Register as a developer and upload your app.

2. App Signing

Securely sign your app to ensure authenticity.

3. App Monetization

Options include ads (Google AdMob), in-app purchases, and subscriptions.

Conclusion

Android development is an exciting and ever-evolving field. By understanding its architecture, components, and best practices, you can create powerful applications that provide excellent user experiences. Whether you’re a beginner or an experienced developer, mastering these fundamentals will set you on the path to success in Android development.

Kotlin Multiplatform Mobile (KMM)

What Is Kotlin Multiplatform Mobile (KMM) and Why Developers Are Switching in 2025

In the rapidly evolving world of mobile app development, one question keeps popping up in 2025:
“Is Kotlin Multiplatform Mobile (KMM) finally ready for prime time?”

The answer is a resounding yes.

Kotlin Multiplatform Mobile (KMM) has matured into a powerful tool that allows developers to share code across Android and iOS while still delivering a native user experience. With growing community support, enhanced tooling, and major production apps going multiplatform, it’s clear why many developers are making the switch.

Let’s break it all down in a simple way.

What Is Kotlin Multiplatform Mobile (KMM)?

Kotlin Multiplatform Mobile (KMM) is a feature of JetBrains’ Kotlin language that enables code sharing between Android and iOS apps. Unlike other cross-platform solutions like Flutter or React Native that render UI across platforms, KMM focuses on sharing business logic, not UI.

This means:

  • You write platform-independent code in Kotlin (like data models, business rules, network calls).
  • You write platform-specific UI with SwiftUI on iOS and Jetpack Compose on Android.

Here’s a visual breakdown:

               ┌──────────────────────────────┐
               │   Shared Kotlin Code (KMM)   │
               │  (Network, DB, Logic, etc.)  │
               └──────────────────────────────┘
                      ▲                 ▲
                      │                 │
        ┌─────────────┘                 └──────────────┐
        │                                              │
┌────────────┐                               ┌────────────┐
│ Android UI │                               │  iOS UI    │
│ Jetpack    │                               │ SwiftUI    │
└────────────┘                               └────────────┘

Why Are Developers Switching to KMM in 2025?

There are several reasons why Kotlin Multiplatform Mobile is trending in 2025. Let’s unpack the big ones:

1. Save Time, Save Money

Instead of writing the same logic twice (once in Kotlin and once in Swift), you write it once and share it. Teams can move faster without compromising on performance or UX.

2. Native Experience, No Compromise

KMM doesn’t touch your UI code. You still get fully native interfaces using the best platform-specific tools (SwiftUI and Jetpack Compose). This means your app feels right at home on both platforms.

3. First-Class Kotlin Support

Kotlin is now officially backed by Google for Android development and tightly integrated into JetBrains’ ecosystem. KMM benefits from constant language updates, better IDE tooling (especially in Android Studio and IntelliJ IDEA), and strong community support.

4. Flexible Adoption

You don’t have to rewrite your entire app. KMM allows gradual adoption. You can start with one shared module and expand as needed. It’s perfect for teams who want to test the waters without a full migration.

How KMM Works — A Simple Code Example

Let’s take a real-world example: fetching user data from an API and displaying it.

Step 1: Define the Shared Code

Inside the shared module:

commonMain/kotlin/UserRepository.kt

expect class HttpClientEngine()

class UserRepository(private val client: HttpClient = HttpClient(HttpClientEngine())) {
    suspend fun fetchUser(): User {
        val response = client.get("https://api.softaai.com/user") // just an example
        return Json.decodeFromString(response.bodyAsText())
    }
}

Here, expect means “I need a platform-specific implementation.” Kotlin will look for it in androidMain and iosMain.

Step 2: Android Implementation

androidMain/kotlin/PlatformHttpClient.kt

actual class HttpClientEngine {
    fun getEngine(): HttpClientEngine = Android.create()
}

Use Android-specific networking, like Ktor’s Android engine.

Step 3: iOS Implementation

iosMain/kotlin/PlatformHttpClient.kt

actual class HttpClientEngine {
    fun getEngine(): HttpClientEngine = Ios.create()
}

Same logic, but for iOS. You keep platform differences isolated and the rest of your business logic remains untouched.

What Makes KMM Developer-Friendly?

  • IDE Support: JetBrains has invested heavily in IntelliJ and Android Studio plugins that make working with shared code intuitive.
  • Official Libraries: Ktor (networking), Kotlinx Serialization, SQLDelight, and Coroutines work seamlessly with KMM.
  • Robust Testing: You can write unit tests for shared logic and run them across platforms.

Is KMM Production-Ready in 2025?

Yes — and it’s not just startups using it anymore.

Companies like VMware, Netflix, and Philips have integrated KMM into their production apps. JetBrains themselves use KMM in their own apps.

With Kotlin 2.0 officially supporting KMM and Kotlin/Native seeing major improvements in performance and stability, developers can now trust it for large-scale, production-grade apps.

When Should You Use Kotlin Multiplatform Mobile?

KMM is a great fit if:

  • You want code sharing between Android and iOS.
  • You want to retain full native UI control.
  • You already have Android developers familiar with Kotlin.
  • You prefer gradual migration over rewriting from scratch.

When NOT to Use KMM?

It might not be ideal if:

  • You want shared UI (in which case Flutter or React Native may suit better).
  • Your team lacks experience with Kotlin.
  • You’re targeting multiple platforms beyond mobile (e.g., Web + Desktop + Mobile).

Conclusion

Kotlin Multiplatform Mobile (KMM) has truly come of age in 2025. It’s no longer a niche experiment — it’s a production-ready, efficient, and modern way to build mobile apps with shared business logic and native performance.

error: Content is protected !!